Interior Design Presentations: The Secret to Winning More Clients
As an interior designer, creating interior design presentations that communicate just how you’ll realize a prospective client’s vision will help you land and ultimately manage projects so you can do more of what you love.

It’s often said that a picture tells a thousand words, which is certainly true with interior design presentations. When your clients see your vision for their project, they’re sure to get excited, and together you’ll be able to finetune the final design.
What Should an Interior Design Presentation Include?
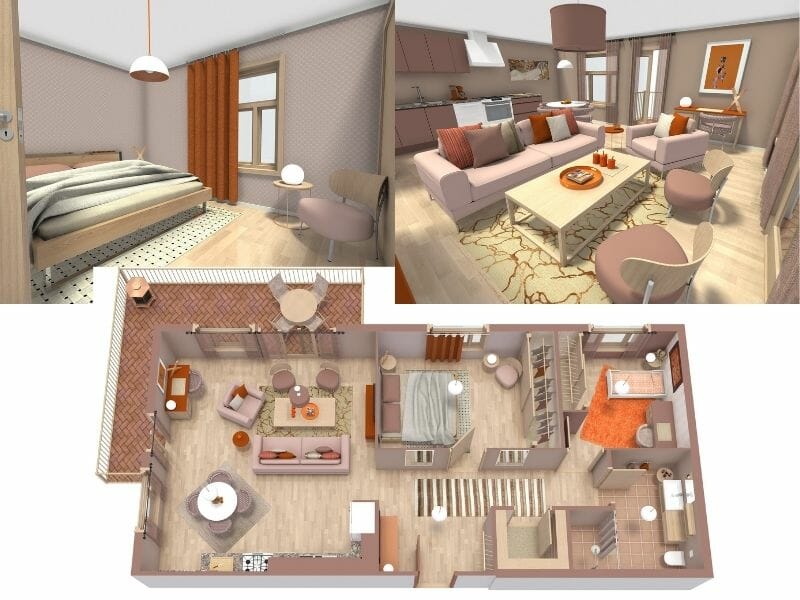
- 3D floor plans. Include the location and size of doors, windows, and built-ins to help clients understand a space's size, layout, and traffic patterns.
- Furniture plan. Help clients visualize each piece's size, shape, color, and texture in combination with the rest of the décor.
- Material samples. Invite clients to explore the wood, metal, glass, fabrics, stone, and/or other materials you plan to use.
- Color scheme. Your understanding of color theory, the psychology of color, and your client’s wishes will help you select the perfect palette.
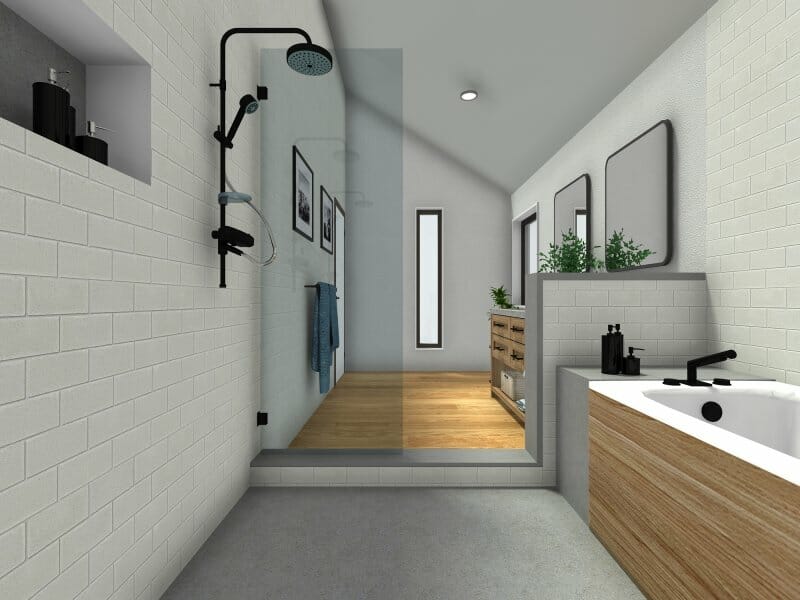
- Renderings. High-resolution floor plans and 3D visuals show texture, materials, and details like interior lighting, sunlight, and shadows.
- Budget. Regardless of a project’s scope or size, determining its budget should be at the top of your to-do list. Break it down by room and provide less-expensive alternatives to big-ticket requests.
- Project schedule. Giving your clients realistic timelines for each phase of the design will go a long way to managing their expectations.
Types of Interior Design Presentations
There are numerous ways to share your design vision with prospective clients, including the following:
Mood Boards
A mood board helps communicate your vision through a collage of images, textures, color palettes, typography, description words, and floor plans. They should represent the look, feel, and emotion you want to achieve, so not every image or sample has to be related to interior design. Pictures of nature, for example, might work.
You can create a physical mood board with a simple foam board and samples inviting clients to see, touch and feel the materials you recommend. Another option is to use graphic design software like the RoomSketcher App to make a digital mood board that can easily be shared with your client and others.

Sketches
Hand-drawn sketches were once the cornerstone of interior design presentations, but many fear they’re becoming a lost art. Yes, they’re being replaced by 3D renderings, but they can still be helpful in communicating a project’s general direction and formulating ideas while you experiment with various options and proportions.
You may even carry a notebook and pencil with you so you can do a quick sketch when inspiration strikes. Because poorly-drawn sketches might confuse rather than inspire prospective clients, many interior designers rely on them as part of their development process. Still, they don’t necessarily share them with clients past an initial meeting.

3D Renderings
With photorealistic 3D rendering presentations, you can take your clients on a virtual tour around their future space and bring fine details of the project to life by zooming in on a specific section of the rendering. You can offer more than one vision and develop ideas in collaboration with clients in real time, allowing you to make better design decisions more quickly and ensuring you’re both satisfied with the final design.
Top Tip
With a RoomSketcher Pro subscription, you can generate sophisticated 3D interior design presentations – quickly, easily, and affordably.
Many clients can select finishes and items they like but struggle to visualize them in a space. That’s why so many interior designers agree that 3D renderings are the most powerful of all interior design presentation tools. Here are some reasons why:
- Better visualization. 2D floor plans simply can’t rival 3D renderings, which give you a realistic overview of the space and design elements. The fully-immersive experience even allows clients to appreciate how the space makes them feel, which is ultimately the most important factor.
- Convenience. Collaborating with prospective clients in real-time allows you to make better design decisions faster and goes a long way to developing a harmonious relationship, which will make the project more enjoyable and can also lead to referrals.
- Meet client expectations. Design customers have come to expect 3D visualizations for their home design projects. Knowing the end result before the project even gets underway allows them to set realistic expectations.
- Save time and money. Interior designers once had to rely on render specialists to create realistic renderings to share with prospective clients, but it’s easy to create 3D renderings with the RoomSketcher App, saving you both time and money.
Steps to Create a Professional Interior Design Presentation
There are lots of reasons why hiring an interior designer is worth it. Often, people need someone to identify a space’s potential and/or pain points and then provide creative solutions that are functional and pleasing to the eye. The following steps will help you create presentations that show clients just how you’ll do that:
1. Sketch your initial design concept
The first step to creating a dynamic interior design presentation is to sketch your initial design concepts for each area clients want to be revamped. Draw a basic layout of the space, make note of its dimensions, and add comments that will help guide the remainder of your design process.

2. Draw a 3D floor plan
The next step is to create the floor plan using RoomSketcher. No technical training is required, so you can get started straight away and draw your floor plan in minutes. RoomSketcher generates a virtual 3D model of your floor plan as you draw.
Upon completion, you’ll be able to see your project in 3D at the click of the click of a button, thanks to state-of-the-art rendering and 3D visualization technology.

Top Tip
With RoomSketcher, create 3D Floor Plans to your liking. Choose to show all furniture or just fixed installations and add labels such as room names and measurements. Once you’ve landed on a signature style that reflects your brand, save your settings to create a unique template available to everyone in your company.
3. Furnish and decorate each room
Next, furnish and decorate your floor plan with furniture, fixtures, appliances, and accessories in the RoomSketcher Product Library, which contains more than 7,000 brand-name and generic items. RoomSketcher Pro gives you exclusive access to our complete product library, which includes even more customizable furniture, fixtures, appliances, and accessories.

4. Highlight fabrics, colors, and materials
Our complete materials library also includes additional options for floors, walls, and ceilings, as well as a full selection of finishes for appliances, cabinets, and countertops. The Replace Materials feature, available with a paid subscription, allows you to change finishes easily. Consider adding labels to help your clients better understand each space and your choices.

5. Add product!
The right accessories inject style and personality into a space while synchronizing and balancing other design elements, taking your project to the next level.
As you know, there’s an art to displaying treasured valuables and collections, creating gallery walls, arranging sofa pillows, and so on. RoomSketcher allows you to add and remove accessories and furnishings until the space is flawless.

Top Tip
Brand your floor plans by including your logo, company name, and colors for a professional touch. Download your floor plans on a letterhead with a logo and custom disclaimer text to complete the look.

6. Share and collect feedback
RoomSketcher automatically creates a professional Project Presentation that you can easily share with others. Simply email the Project Presentation link to your client and other design team members, including the project manager, or post it on social media accounts like Twitter or Facebook to draw followers and drum up business.
Recipients will receive an engaging presentation that includes Floor Plans, Live 3D, 3D Photos, and the furniture used in the project. Whether meeting clients in person or remotely, you can view different options and change dynamically. Update your project presentation at the click of a button with RoomSketcher instant correction and fast premium rendering. That’s productive!

7. Create 3D Photos that wow clients
An easy-to-use camera tool lets you take 3D Snapshots of any part of your design as if you were standing in the room. Create and save multiple snapshots to compare and present different design options. Upgrade key snapshots at the click of a button to create stunningly realistic 3D Photos sure to impress clients.

Create Better Interior Design Presentations Beginning Today
As an interior designer, you take pride in creating spaces that will positively impact the happiness and well-being of the people who use them. Engaging and well-organized interior design presentations help you develop your vision and improve your chances of landing projects so you can do just that.
Take your Interior Design Presentations to the next level with RoomSketcher!
Don't forget to share this post!
Recommended Reads

How Interior Designer Debbie Bryant Wins Clients with RoomSketcher
Interior designer Debbie Bryant knows that winning clients starts with clear communication. With RoomSketcher, she turns ideas into visuals her clients can instantly understand and get excited about.

The Ultimate Guide to Interior Design Product Sourcing
Take your interior design product sourcing to the next level with RoomSketcher 3D Home Design Software.

Secrets to a Successful Interior Design Installation Day
Make your interior design installations more efficient using RoomSketcher online 3D home design software.