5 Tips for Great 3D Interior Design Photos
A number of our customers have asked if the awesome interior design photos we use in our articles and social media are really created in the RoomSketcher App. They are! And you can create great 3D interior design photos of your design projects too using the RoomSketcher App – here’s how!


The virtual camera in the RoomSketcher App works much like a real camera. You can adjust the camera height (elevation) and aperture (field of view) to get wide-angle shots or zoom in for detailed close-ups. Create instant snapshots and generate stunning high-quality 3D Photos of your designs with these five expert interior design photo tips:
Step 1. Camera Elevation
Have you ever noticed that professional photographers always use a tripod? This isn’t just to hold the camera steady. It’s also to shoot the room from an optimal height, which is lower than you think. Interior design photos should show some floor and some ceiling. If the camera is set too high, the photo will be dominated by the ceiling. Set it too low, the photo will be all floor. To create a balanced image, set your camera height in Properties to be approximately half the height of the room. For example, if the room is 8’ (250cm) high, set the camera height at 4’ (125cm).
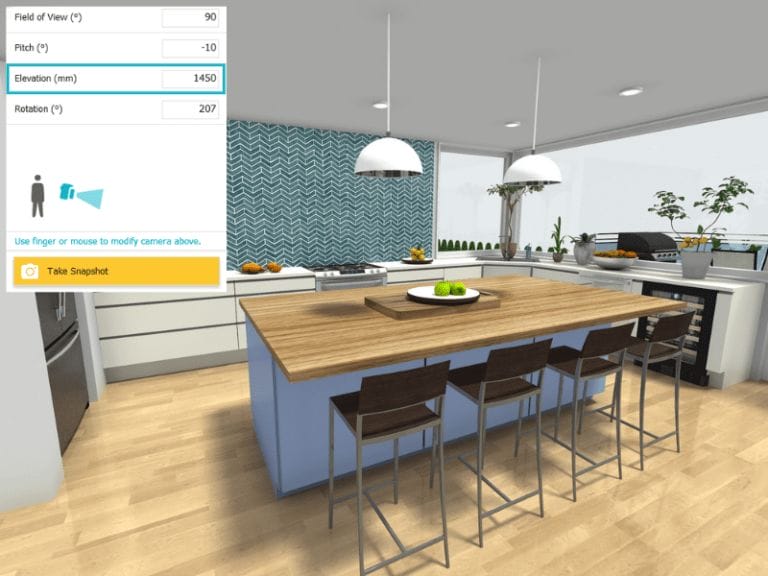
Adjust the camera elevation on the right-hand side in the App and take an instant snapshot to preview.
Step 2. Camera Pitch
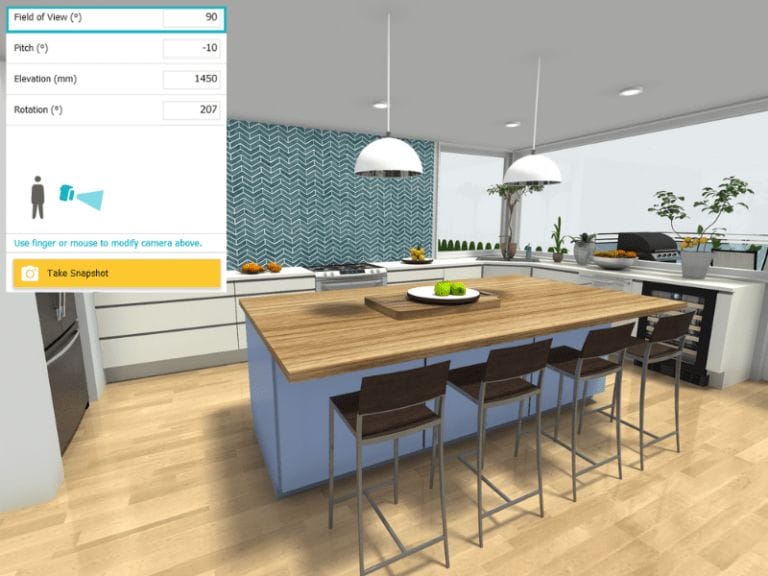
Once you have set your camera height, you can also adjust the camera angle. Use the pitch adjustment to capture a little more detail on the ceiling or the floor. We find that most 3D interior design photos look more natural with a slight pitch downward. This replicates how we tend to view rooms.

Adjust the camera pitch on the right-hand side in the App to raise or lower the viewing angle.
Learn More!
If you want to learn more about taking great interior photos, watch this short photography tutorial.
Step 3. Create Dynamic Views
One of the best ways to capture the interior design of a room is to shoot it at an angle, from either a corner or the entry point of the room. Place the camera in each of these locations on your floor plan and take a quick snapshot to find the best viewpoint. Avoid aiming the camera directly at the opposite corner. Instead, rotate the camera slightly so the corner of the room is off to one side. This will give your room view a sense of movement and openness for a more dynamic photo.

Rotate the camera view away from the corner to create a more dynamic interior design photo.
Step 4. Set Up Focal Points
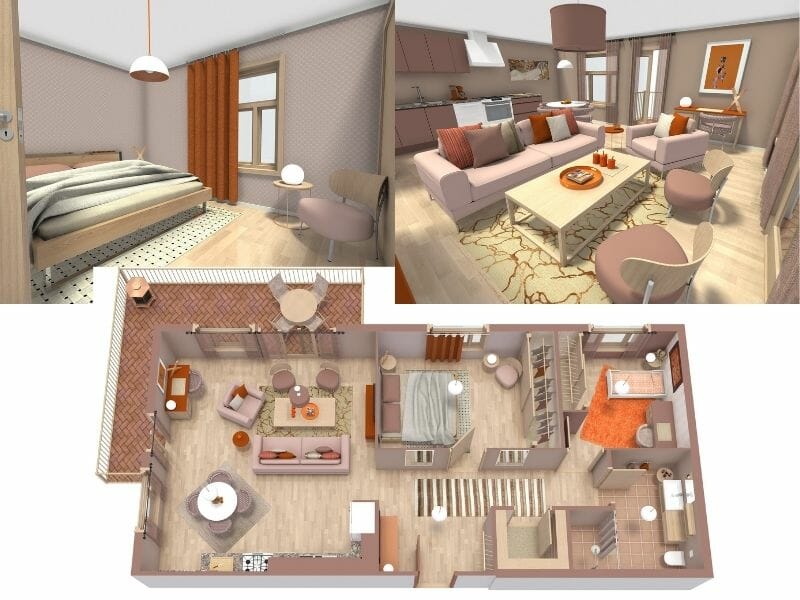
The human eye loves symmetry and focal points. To create clear 3D interior design photos you want to set up focal points. You can create photos with a single focal point OR set up three to create a triangular pattern. This helps the viewer to focus and take in the whole image. You can use architectural details, fixtures, furniture, accessories and even color to create focal points in your photos.

Above: Room image with a single focal point. Although the seating is not centered in the room, the photo still captures both the room symmetry and seating symmetry by being shot at an angle.

Above: Room image with focal point triangulation. The chandelier, tub, and chair create three focal points. This photo uses both color and accessories to help reinforce these.
Step 5. Adjust the Field of View
Take wide-angle shots to show the full room and all its elements. Or narrow the field of view on the camera to take detailed close-ups to showcase materials and textures in your designs. When presenting an interior design, it’s always good to show both wide-angle images and detailed close-ups to convey the full scope of your design.
Adjust the camera’s field of view to zoom in to create detailed images of your interior designs.
These 3D interior design photos were all created with the RoomSketcher App. You can use RoomSketcher to visualize YOUR interior design ideas. Just draw up your floor plan, furnish and decorate and visualize in 3D. It’s that easy!
Don't forget to share this post!
Recommended Reads

3D Floor Plans & Property Photography - a Winning Combination!
Check out why Property Photographers should add 3D Floor Plans from RoomSketcher to their portfolio - earn extra revenue and add more value to your Real Estate clients.
Interior Design Presentations: The Secret to Winning More Clients
Create professional 3D interior design images and interactive project presentations online- quickly, easily and affordably using the RoomSketcher App!

How to Take Premium 3D Photos in RoomSketcher
Learn how to take gorgeous photo-realistic 3D images of your design project in RoomSketcher.