5 Tips for Designing Your Accessible Bathroom
Whether you're looking to "age in place" or accommodate someone who needs extra assistance, incorporating accessible features from the start is essential. Read on for our top tips for designing an accessible bathroom.

Key Takeaways:
- Entry: Ensure door width is 32-36 inches (815-915 mm) with a flat threshold for easy access.
- Room Dimensions: Provide a turning space of 60 inches (1525 mm) and extra clearance around the toilet.
- Sink Area: Choose a roll-under sink design, use a long-handle faucet, and install a tilted mirror for better visibility.
- Toilet Features: Allow side clearance for a wheelchair, install grab bars, and opt for a comfort-height toilet with accessible flush controls.
- Shower Design: Aim for a shower width of 32-36 inches (815-915 mm) and a depth of 60 inches (1525 mm) with a curbless entry for easy access.
- Stylish Fixtures: Select accessible fixtures that also enhance the bathroom's aesthetic.
- Temporary Solutions: Consider removable grab bars or other aids if a full renovation isn't feasible.
- Safety First: Incorporate non-slip surfaces and supportive features for added safety.
What is an Accessible Bathroom?
An accessible bathroom is designed so that everyone can use it, regardless of their age or physical abilities.
This could mean wider doorways so a wheelchair can zip right in, or grab bars near the toilet and shower for a helping hand. It might have a sink you can roll under, or a shower you can wheel into without any bumps or steps.
Here are 5 tips for designing your accessible bathroom that will help you create a space that's functional, safe, and welcoming for everyone.
1. Make the Bathroom Entry Large Enough
To make sure a wheelchair can get through the door without a struggle, you'll want the doorway to be at least 32 inches wide. If you have the space, 36 inches is even better. This extra space is a real help, especially if you're coming in from a hallway and need to turn.
Make sure the floor is as smooth as possible. Avoid any raised lip or threshold. The entry should be designed to make that transition from outside to inside seamless.
💡Can't widen your doorway?
Use offset hinges. They can give you an extra inch or two of clearance without tearing down walls. It's a small change that can make a big difference.
2. Understand Important Room Dimensions

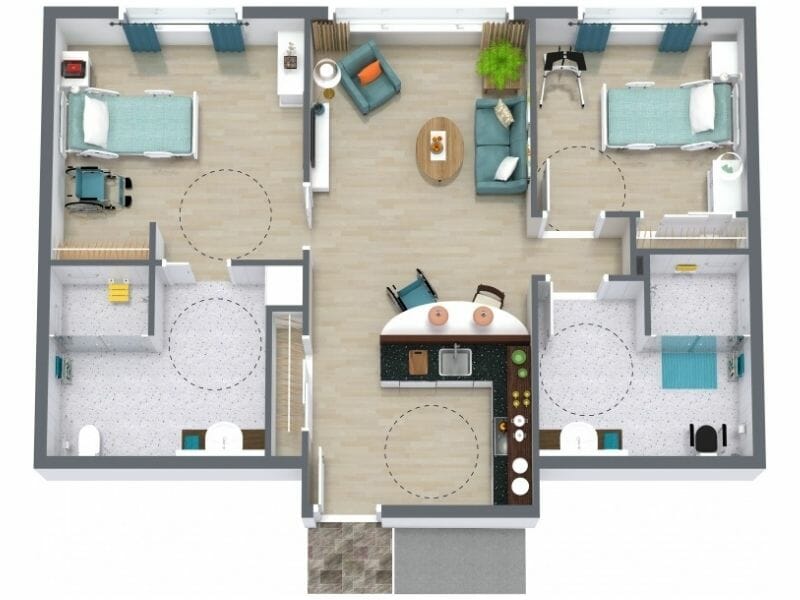
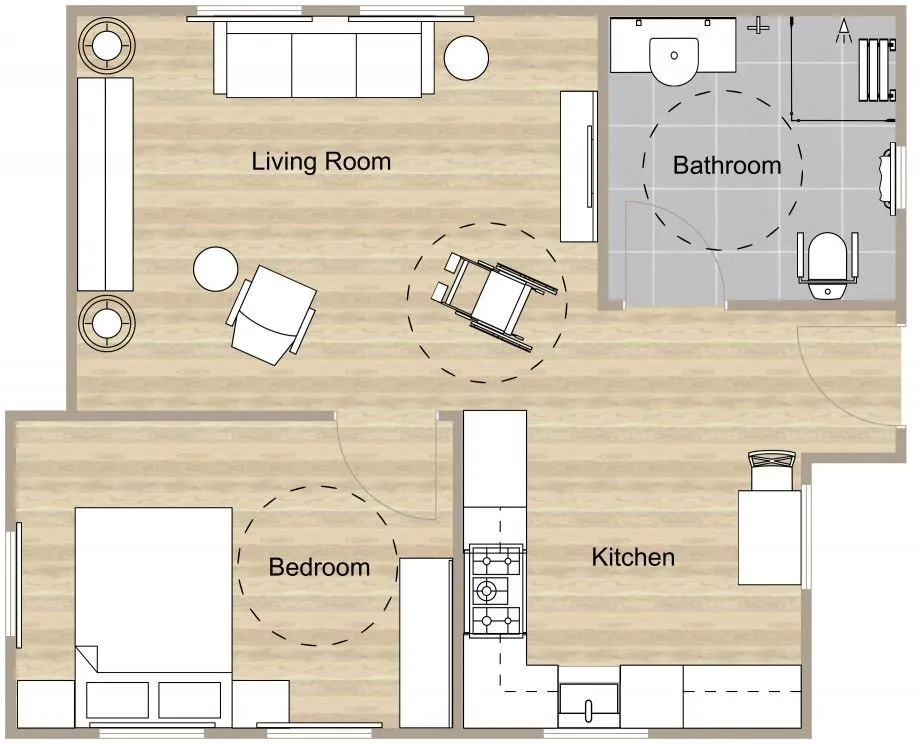
The Americans With Disabilities Act (ADA) states that a wheelchair should have a circular space about 5 feet (1524mm) wide to turn around. If you've ever seen a floor plan with a circle drawn on it, that is what it's for—showing where a wheelchair can spin.
Remember to include room around the toilet, too. Aim for about 5 feet of space from the side wall and almost 5 feet from the back wall. This gives enough space to maneuver or for someone to help if needed.
Don't worry if these measurements seem large. Even if you can't build a bathroom to measure up to these exact numbers, any extra space you can add will make a big difference. Remember, it's about making things better. Every inch counts when making a bathroom more accessible.
3. Create an Accessible Sink Area
You need enough space underneath the sink for someone in a wheelchair to access it properly. Look for sinks that are open below or have a slanted front. A pedestal sink can work, too. For the faucet, go for one with a long, single handle—it's much easier to reach and use.
For the mirror, a tilted design that angles down will help wheelchair users see themselves more comfortably.
Instead of a high medicine cabinet, think about installing lower drawers or a medicine cabinet that’s easy to reach.
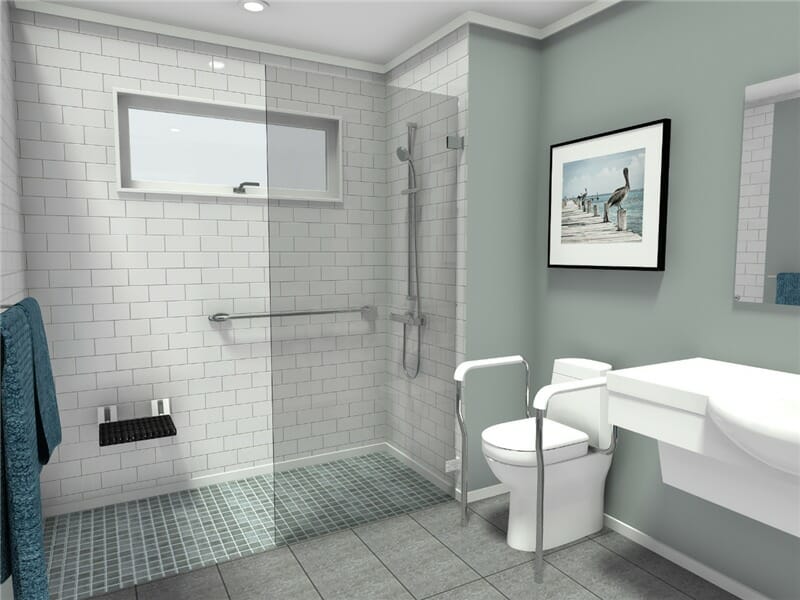
4. Add Extra Space Around Toilet

As mentioned above, it's a good idea to leave some open space on one side of the toilet. This gives room for a wheelchair to get close or for someone to help out if needed. Adding grab bars near the toilet can also make a big difference.
You might want to look into a taller toilet, sometimes called "comfort height." It can be easier for many people to use. A bidet could be a nice addition as well.
When picking out these fixtures, think about where the flush controls are. You want them in a spot that's easy to reach and use.
💡Quick fixes
If you're not ready for a full bathroom overhaul, don't worry. There are some quick fixes you can try.
Removable grab bars are great—you can put them up and take them down as needed.
You could also get a freestanding toilet frame for extra support.
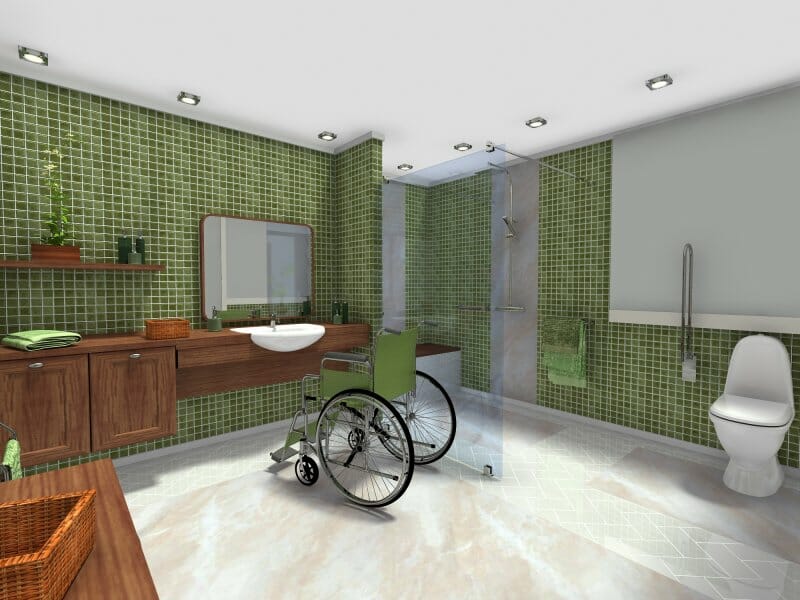
5. Include a Flat and Wide Shower Entry

Showers are often easier and safer to use than bathtubs. You'll want to make sure the shower space is large enough for a wheelchair and maybe another person to help out. Aim for about 2 feet wide and 5 feet deep in you can.
The shower entrance is a key feature. Make it wide - around 3 feet is great - and keep it flat at the entrance. This way, someone can roll right in without bumping over a high edge.
Adding a bench in the shower is very helpful. You can choose a fold-down option, a portable stool, or a fixed bench.
Put the shower controls where they're easy to reach, and consider a handheld showerhead. It gives you or a helper more flexibility when washing.
Frequently Asked Questions (FAQ):
No, anyone can benefit from an accessible bathroom. These spaces are made for anyone who needs a little extra support when using the facilities.
For instance, people recovering from an injury, seniors, or parents with young kids often find features like grab bars and larger stalls handy. It’s all about making the bathroom easier and more comfortable for everyone.
Accessible toilets usually don't have lids. This is because having a lid can sometimes get in the way, especially for wheelchair users who might need to transfer or maneuver around the toilet.
If a lid is included, it should be easy to lift and not interfere with grab bars or other features that provide support.
Choosing the right grab bars for your bathroom starts with considering who will use them, as their height and mobility needs vary.
Look for bars 12 to 36 inches long, depending on where you plan to install them—longer bars are great for horizontal placement, while shorter ones work well vertically.
A standard diameter of 1.5 inches is comfortable for most people. Common installation spots include next to the toilet, in the shower, and along the bathtub.
Select bars with a slip-resistant finish for a better grip when wet, and check that they can support at least 250 pounds.
Design an Accessible Bathroom in RoomSketcher
With RoomSketcher, you can easily design a space that meets your needs and preferences. Our Bathroom Design Tool has everything you need to create and visualize your layout.
Plus, don't forget to check out our custom-made accessible bathroom templates that you can customize directly in the RoomSketcher App.
Whether you're looking for inspiration or want to get hands-on with your design, RoomSketcher has everything you need to make your bathroom both accessible and stylish.
Don't forget to share this post!
Recommended Reads
Design a Wheelchair Accessible Senior Bathroom Floor Plan
Here are some of the top steps to design a wheelchair accessible senior bathroom.
How to Make Your Home Wheelchair Accessible
With many new products and styles on the market today, you can to design a wheelchair accessible home that is functional and beautiful.
10 Best Wheelchair Accessible Home Floor Plans
We’ve compiled ten great layouts catering to various needs, including roll-in showers and open kitchens.