Design a Wheelchair Accessible Senior Bathroom Floor Plan
Designing a senior-friendly bathroom is essential for safety and comfort, and with RoomSketcher, it's easier than ever. This guide will walk you through the simple steps to create an accessible and stylish bathroom.

Do you need to remodel a bathroom to make it more senior-friendly?
With RoomSketcher, you can try out different floor plans and design ideas and visualize them in 3D. This helps you make the best plan the first time around.
RoomSketcher also offers helpful features for senior floor plans, such as grab bars, shower benches, and wheelchair-accessible sinks.
Here's how to make a wheelchair-accessible senior bathroom with RoomSketcher.
Step 1: Draw up the Bathroom Floor Plan
First, measure your existing bathroom if the walls will stay the same. If you're designing a new bathroom, decide on its size and draw the walls in the RoomSketcher App. This process is quick and simple—just click and drag to create your walls.
Ensure the bathroom door is at least 32 inches wide, though 36 inches is ideal for wheelchair accessibility.
Adding a Shower
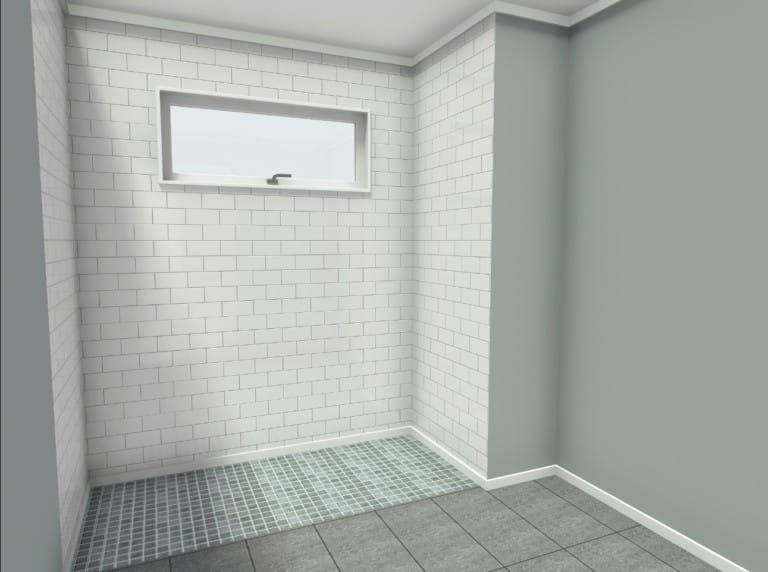
If you plan to add a shower, use a divider line to mark its location. This line helps indicate changes in finishes, such as different types of tiles.
The divider line is visible in the image below but will not appear in your final photos or floor plans.
A curbless or roll-in shower should have at least 60 inches of clear floor space to accommodate a wheelchair.

Step 2: Add Doors, Windows, and a Wheelchair Turning Radius Symbol
Now, let's add doors, windows, and a wheelchair-turning radius symbol if needed. This symbol helps ensure there's enough space for a wheelchair to move around easily.
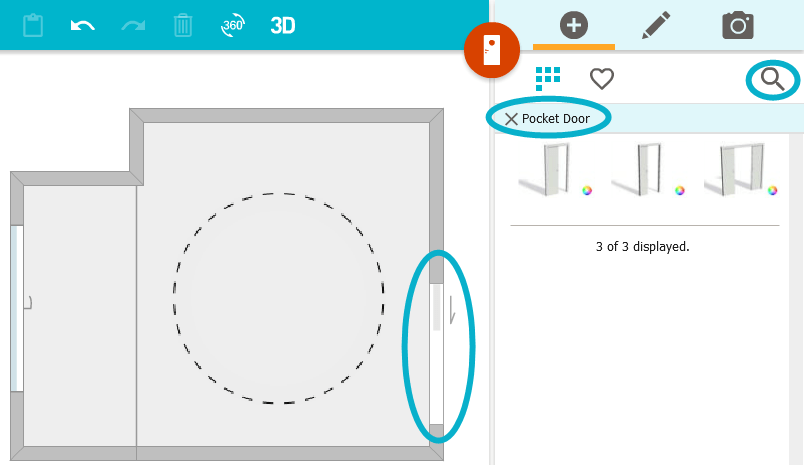
How to Add Doors and Windows:
- Switch to Windows mode in RoomSketcher.
- Open the Doors category on the right side or use the Search button.
- Look for a "Pocket Door" or "Interior Door." Choose a wide one for wheelchair access.
- Click to select the door, then click again to place it on your floor plan.
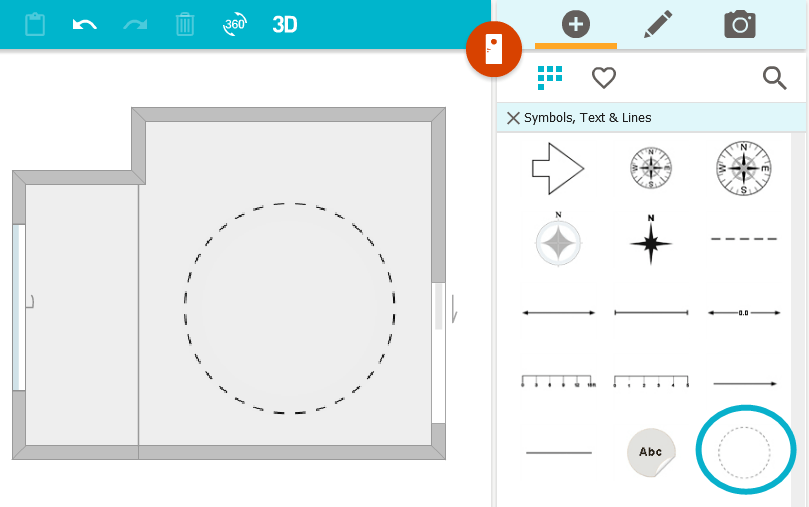
How to Add the Wheelchair Symbol:
- Open the "Symbols, Text & Lines" category.
- Find and select the circular Wheelchair symbol.
- Click to place it on your design where needed.
Step 3: Add Finishes and Create an Accessible Shower Area
Next, you may want to add tile to the floors and shower walls and paint on the other bathroom walls. Once again, the process is so easy!
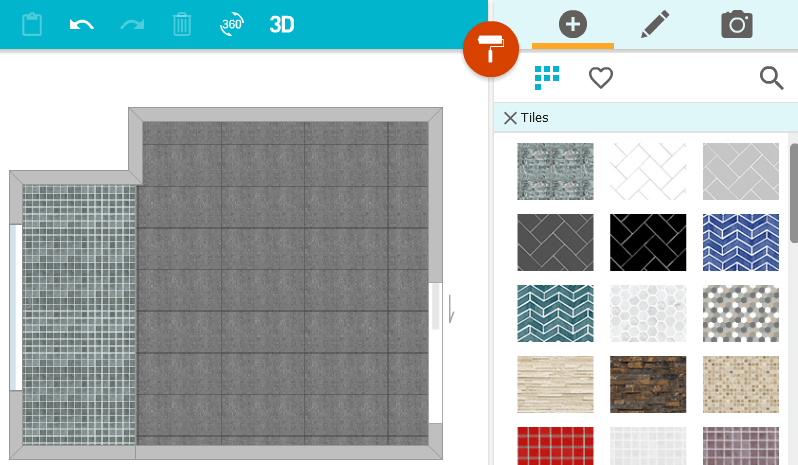
How to Add Flooring and Wall Materials:
- Switch to Materials mode and open the Tile category.
- Choose a larger tile for the main floor and a smaller tile for the shower floor. Smaller tiles with more grout lines make the shower floor less slippery, which is important for safety in a senior bathroom.
- Click to select a tile, then click in the room to apply it to the floor, walls, or both.
💡Tip: While ceramic tile is a popular choice, natural stone tile can also be a great option for bathrooms. Consider the pros and cons of different tile materials for your specific needs.
For the Shower Walls:
- Click the Add tab, then use the Search button to find "subway tile" (or your preferred tile).
- Select the tile and click inside the shower area to place it on the shower wall.
Painting the Walls:
- Search for "paint" and choose your desired color.
- Click to select the paint and click in the room to apply it to the walls.
Here is a 3D Photo of the bathroom with the added finishes:
Step 4: Add Bathroom Fixtures
Now it’s time for the fun part—adding furniture and fixtures to your senior bathroom design!
In this example, we will add a wheelchair-accessible sink, a toilet with grab bars, a towel rack, and shower fixtures. We'll also include grab bars and a fold-down seat in the shower.
- Open Furniture Mode: In the RoomSketcher App, switch to Furniture mode and then select the Bathroom category.
- Browse or Search for Items: You can scroll through a variety of bathroom items or use the Search button to find specific ones. Here are some helpful search terms:
- “Wheelchair”: This will show wheelchairs and wheelchair-accessible vanity units.
- “Shower seat”: This will help you find a fold-down shower seat.
- “Bathroom bar”: This will display grab bars.
- “Toilet accessible”: This will show toilets with additional grab bars.
- Select and Place Items: When you find an item you like in the product library, click to select it and then click again to place it in your design.
- Visualize Your Design: As you add items, use the virtual camera feature to see how your design is shaping up. You can also view a 3D photo of the room as it progresses.
Step 5: Visualize with Photos and the Floor Plan
While adding furniture and fixtures, use RoomSketcher’s snapshot feature to see how the room is turning out.
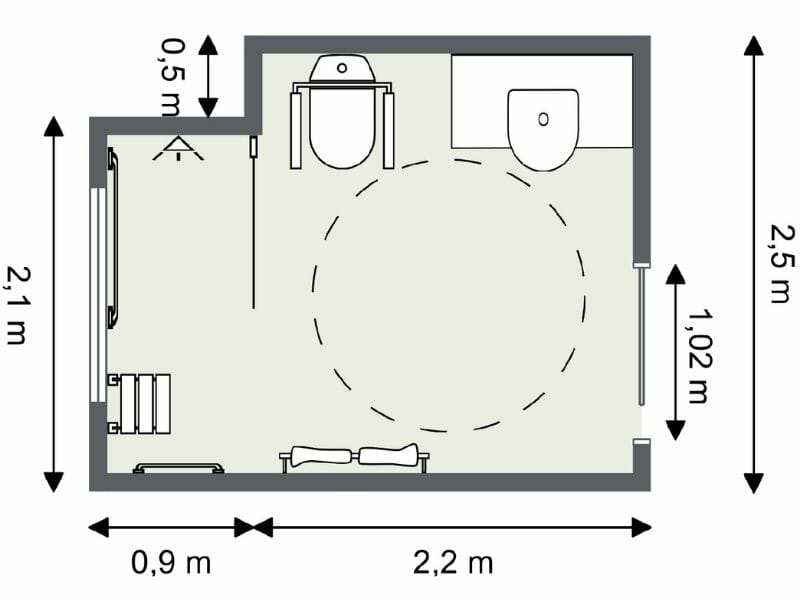
Once you are happy with your choices, you can generate a floor plan (for example, to review with a contractor) and high-resolution 3D Photos. Here is our 2D Floor Plan, complete with measurements:
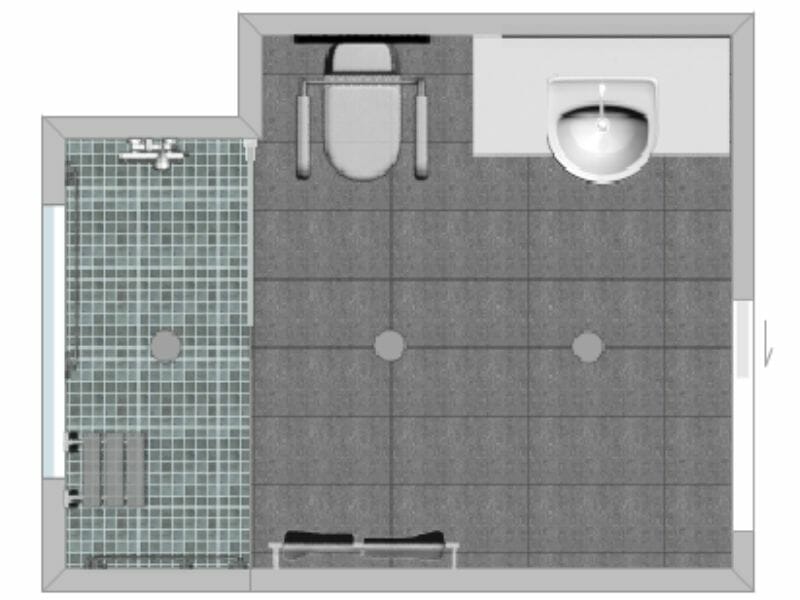
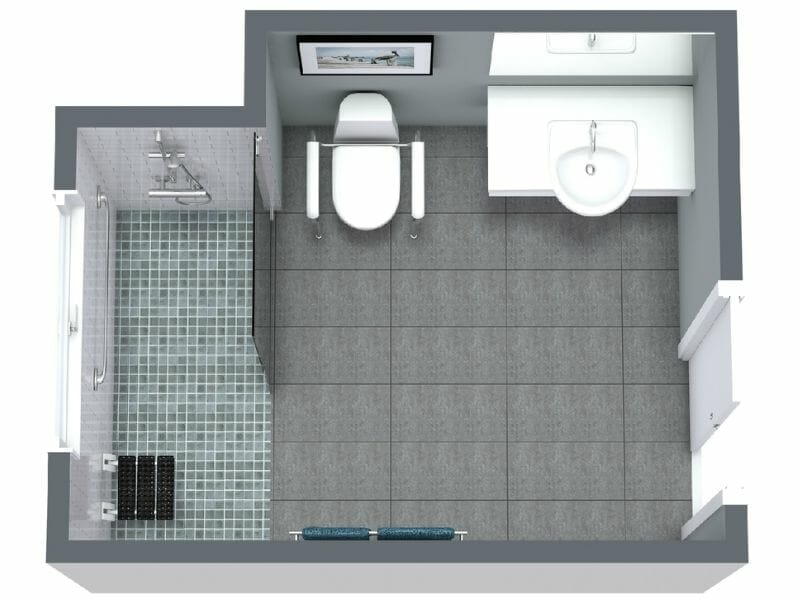
Here is the 3D Floor Plan that shows the materials used:
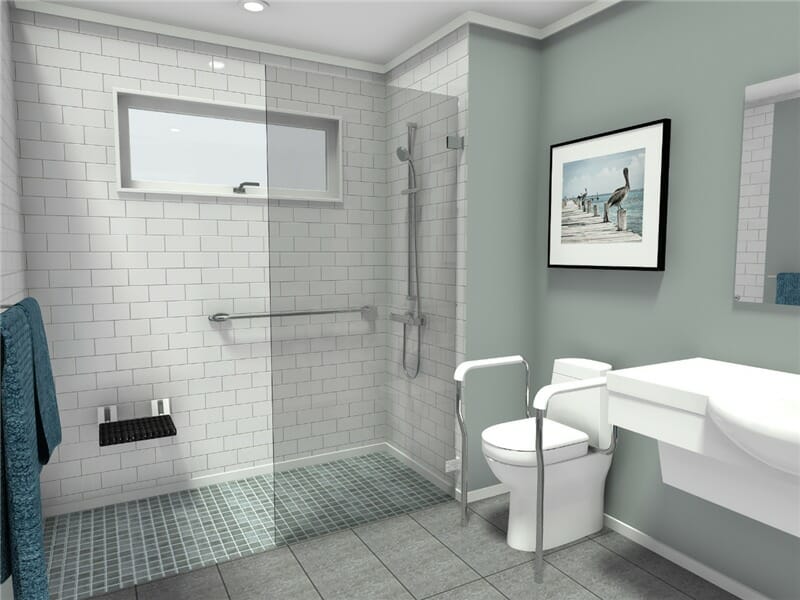
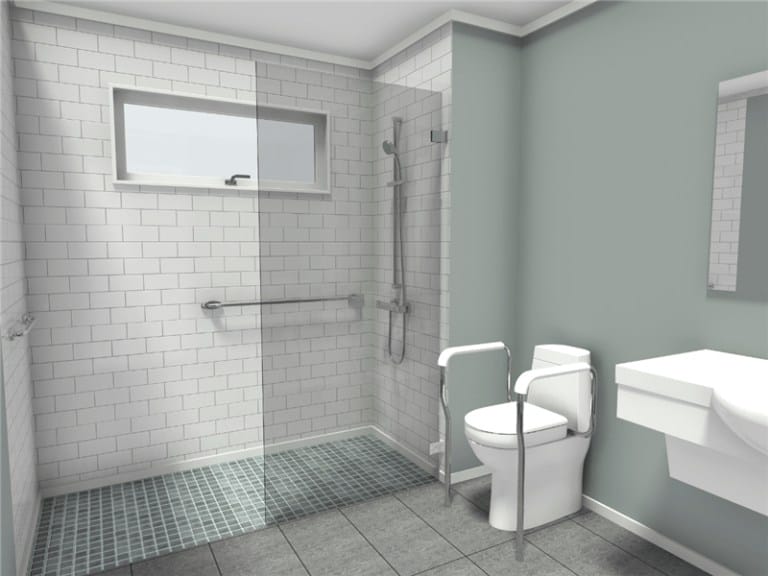
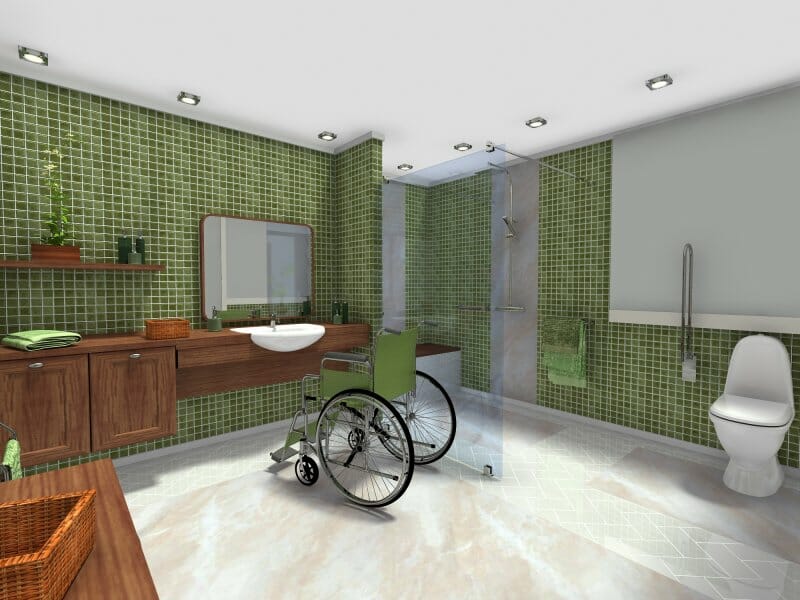
And here is a final 3D Photo of the new bathroom design:
Start planning your accessible bathroom today with RoomSketcher! Every user can access the RoomSketcher App for free and capture snapshots of their design. Don’t wait—bring your vision to life today.
Learn More About Bathroom Planning and Accessibility
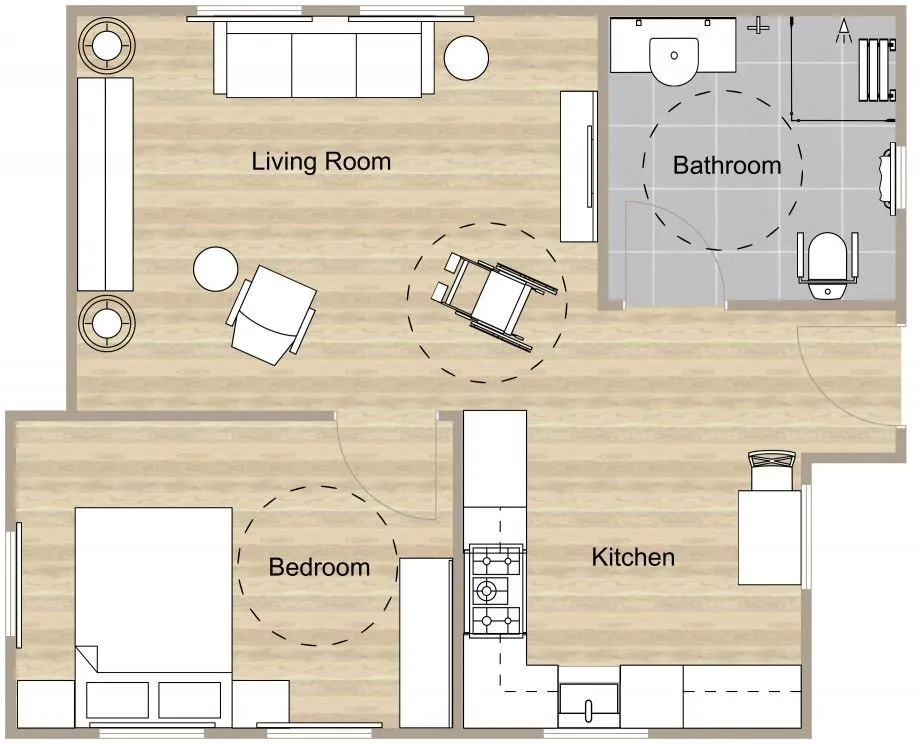
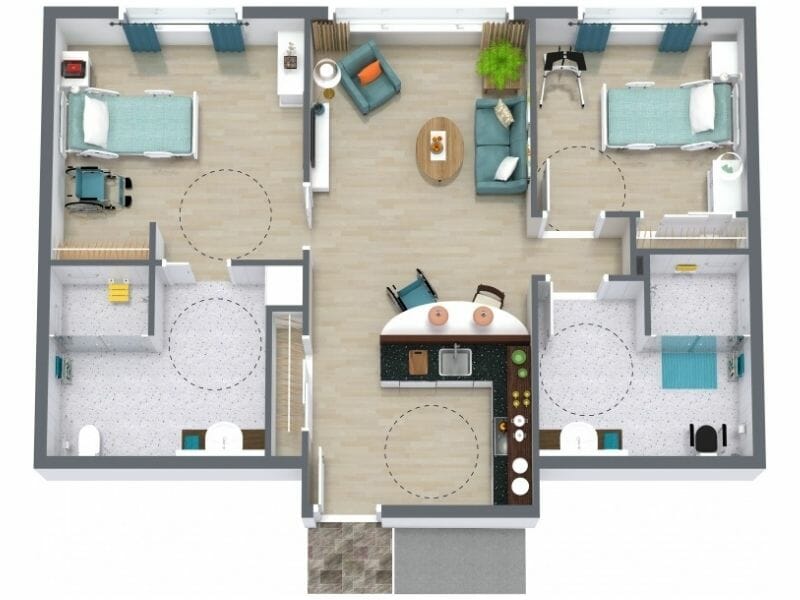
10 Best Wheelchair Accessible Home Floor Plans
We’ve compiled ten great layouts catering to various needs, including roll-in showers and open kitchens.
5 Tips for Designing Your Accessible Bathroom
Want to add accessible features to your bathroom floor plan? Read on for ideas, key dimensions, and beautiful inspiration photos.
How to Make Your Home Wheelchair Accessible
With many new products and styles on the market today, you can to design a wheelchair accessible home that is functional and beautiful.