7 Tips and Tricks to Speed Up Drawing in the RoomSketcher App
Check out our best tips and tricks on how you can speed up drawing floor plans in the RoomSketcher App. Who knows, maybe you’ll find something you’ve been missing?


Whether you are a seasoned drawer or a beginner, here is a list of our 7 favorite tips and tricks to help you draw floor plans fast:
- Type in the exact wall length
- Always show furniture
- Smart shortcuts to save time
- Use hex codes to get the exact color you want
- Zoom in to get a better look at details
- Work side by side with Live 3D and app
- Share Live 3D and 360 Views
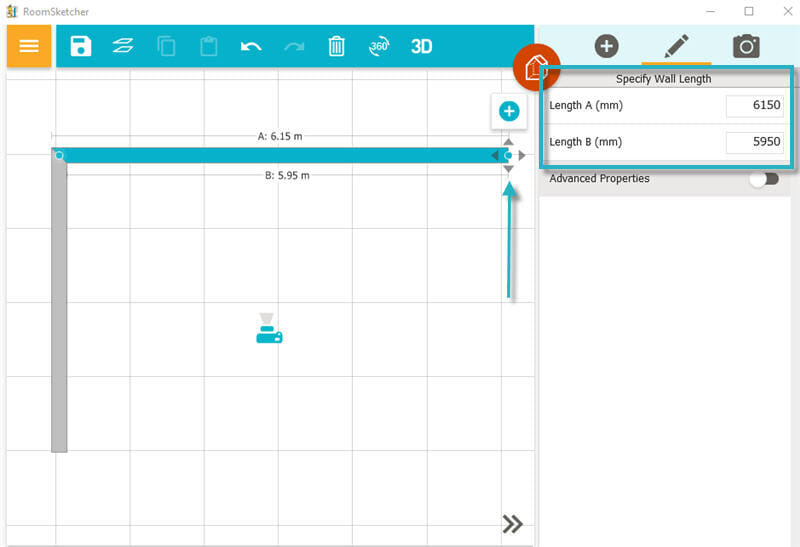
1. Type in the Exact Wall Length
Sometimes you need your floor plan to match the actual size of a home or property.
When you draw walls in the app, the wall lengths appear as you draw. If you don’t happen to hit the exact wall length that you are aiming for, you can insert the measurements manually.
Just click on the end of a wall so that the wall turns blue. Then, in the right pane, you can type an exact wall length for the inside or outside edge of the wall.
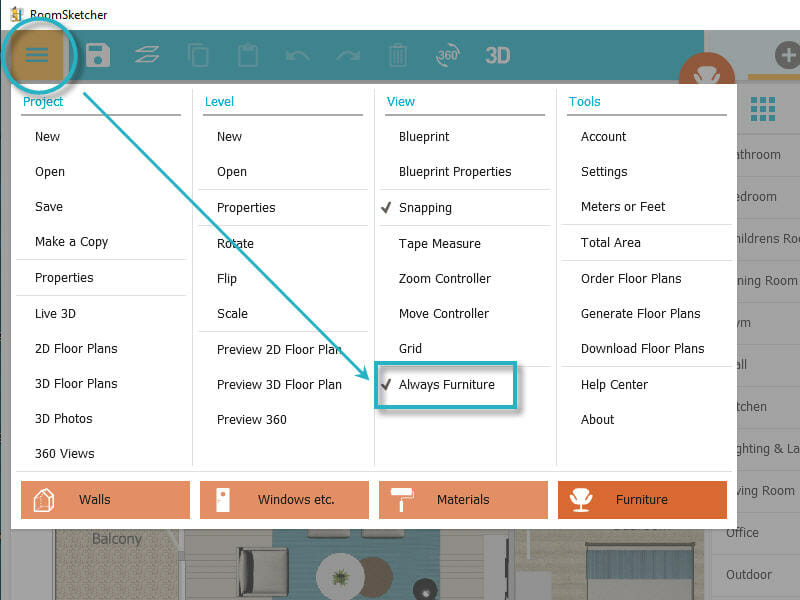
2. Always Show Furniture
As many of you know, there are four different modes in the RoomSketcher App - Walls, Windows, Materials, and Furniture.
Sometimes it’s useful for furniture to be visible in all modes - like when you need to move a window or a wall, and you don’t want the new placement to “crash” with existing furniture. That’s why we created the “Always Furniture” feature.
This way, you’ll always have an overview of your furniture, regardless of which mode you’re in.
To enable Always Furniture, in the top left, open the yellow menu, and under View, click Always Furniture.
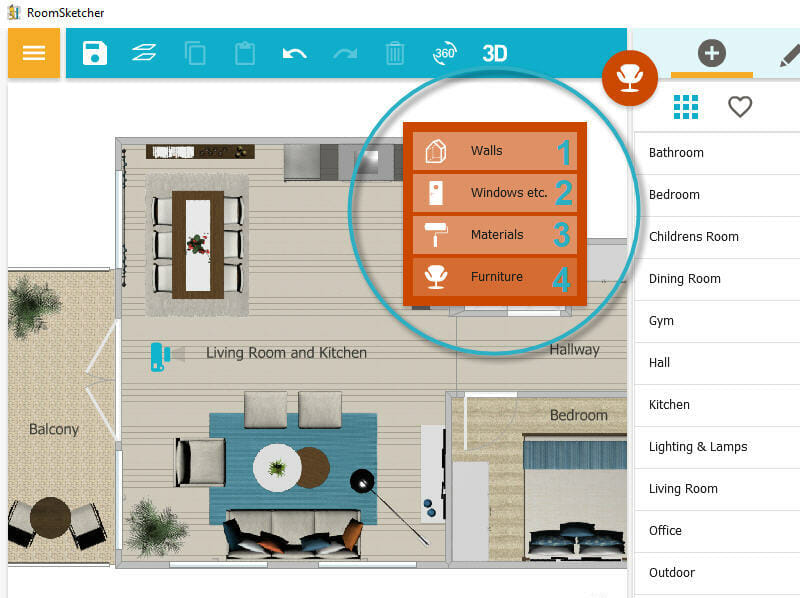
3. Smart Shortcuts to Save Time
Did you know we have a bunch of helpful shortcuts in the RoomSketcher App?
One of our favorite time-savers is this quick way to switch between RoomSketcher’s four modes: just press the number keys on your keyboard: 1 for Walls, 2 for Windows, etc., 3 for Materials, and 4 for Furniture.
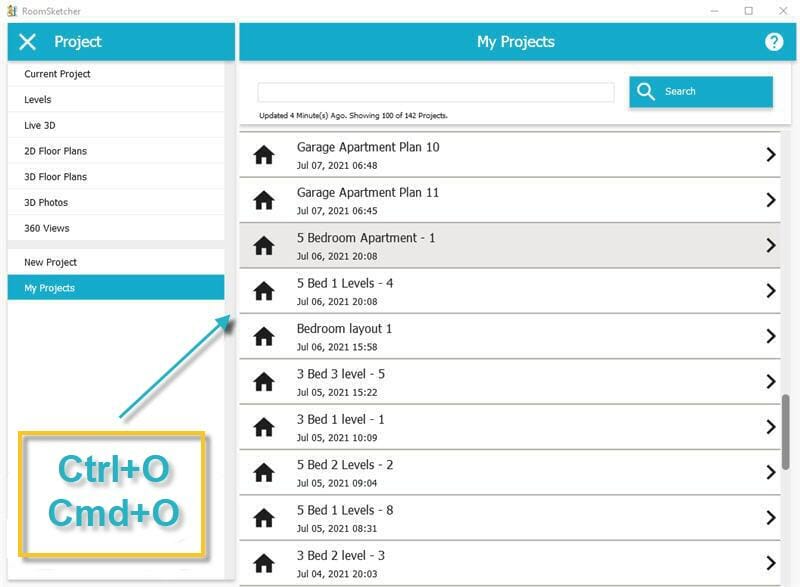
Another favorite is Ctrl+O (Windows) or Cmd+O (Mac) to quickly access your list of projects created in the app.
You can even toggle the Always Furniture feature on or off with Ctrl+A (Windows) or Cmd+A (Mac).
4. Use Hex Codes to Get the Exact Color You Want
Have you ever wanted to use a specific color, but haven’t been able to find it in the app?
You can actually choose whatever color you want. Just find that color’s Hex code on the web, from a color wheel, or from a paint sample, and then type it in the RoomSketcher App.
This means you can super-personalize walls, furniture, and fixtures with colors - the options are endless!
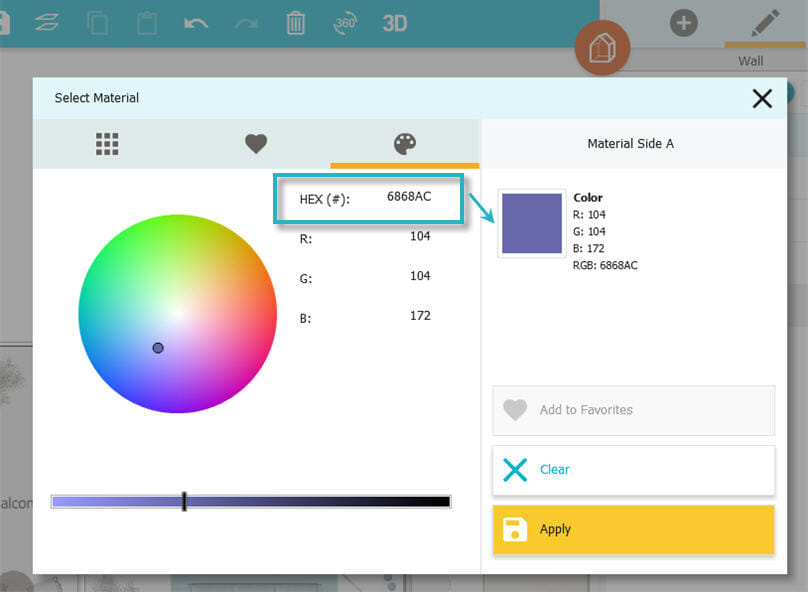
Check out the screenshot below to see how to change the color on a single wall. In RoomSketcher’s Walls mode, click on the specific wall, then, on the right, click Material Side A or Side B (to choose which side of the wall to color). Click the Paint Palette. In the Hex(#) box, type the Hex code and click Apply.
If you don’t have a specific color in mind, you could also try the color wheel until you find that perfect shade.
5. Zoom In to Get a Better Look at Details
If you’re working on a sizable project, or just need to have a closer look at a particular room, you’ll find zooming into your workspace a big help.
You can zoom in and out on any part of your drawing by scrolling your computer mouse wheel or pinching in and out on your tablet.
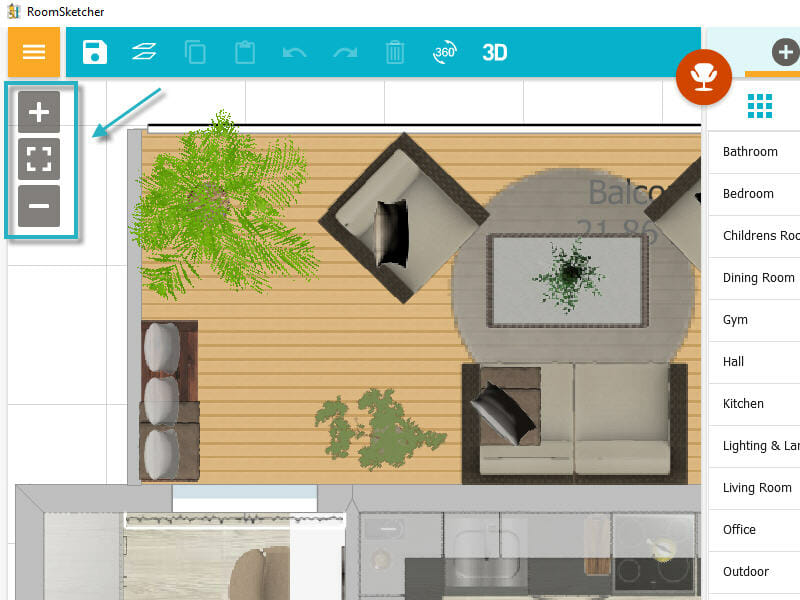
Another option is to display the Zoom Controllers. In the top left, go to the yellow menu, and under View, click Zoom Controller. You’ll see three buttons appear which will help you zoom in, out, and reset your view.
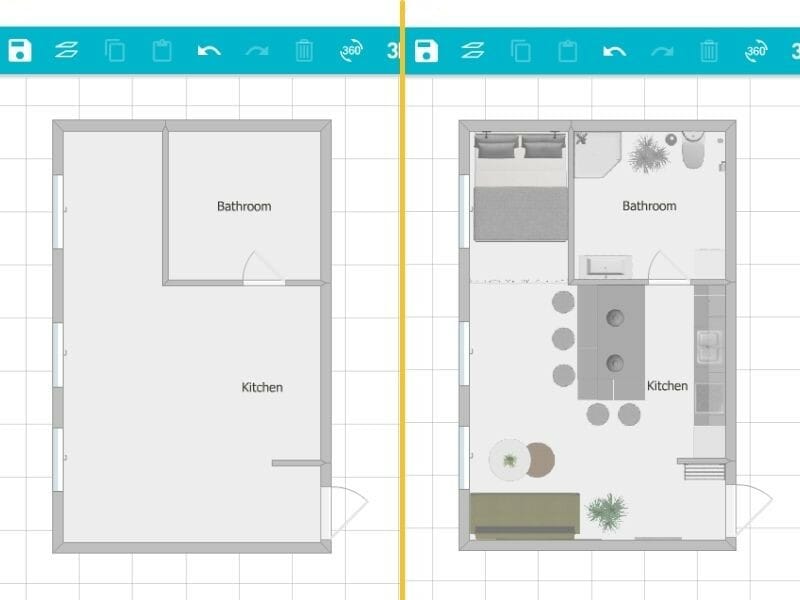
6. Work Side by Side With Live 3D and App
Many of you know and love the Live 3D feature for visualizing projects - but did you know that the feature is great to use while you edit too?
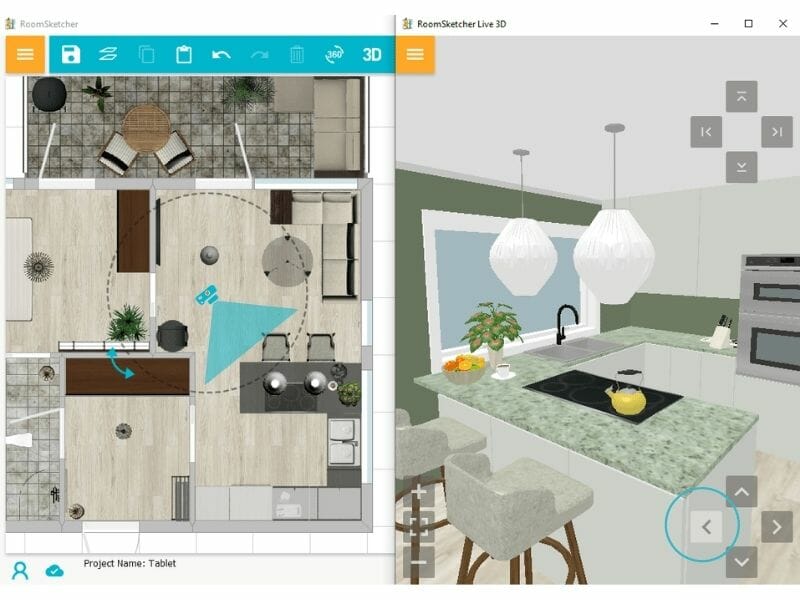
If you’re working on a computer, you can save lots of time placing the app and Live 3D windows next to each other. Then, as you edit your design, you’ll instantly see the change in Live 3D.
Plus, it’s so much fun seeing your ideas appear right in front of your eyes!
7. Share Live 3D and 360 Views
If you’re like us, you like to get input on your design ideas. Or maybe you want to share your vision with a client?
This is where Share Your Project comes in handy.
You can share generated floor plans, 3D Photos, 360 Views, and Live 3D with anyone using the RoomSketcher App. They can even open a copy of the project to play around with ideas or to provide feedback.
Sharing a project is a terrific way to get input from clients, friends, or family or show off your finished results.
Now that you know how to draw floor plans faster, dive into the RoomSketcher App and give these tips a go. You'll be amazed at how much more efficient your drawing process will be.
Didn’t Find What You Were Looking For?
Our Help Center offers many helpful tips and tricks, along with various video tutorials. If you need additional assistance or would like to provide feedback, our friendly customer service team is always here to help.
Don't forget to share this post!
Recommended Reads
Black-and-White Floor Plans: Simple but Effective!
We’ll guide you create industry-standard black-and-white floor plans. Find out why they’re crucial in real estate marketing and perfect for project design!
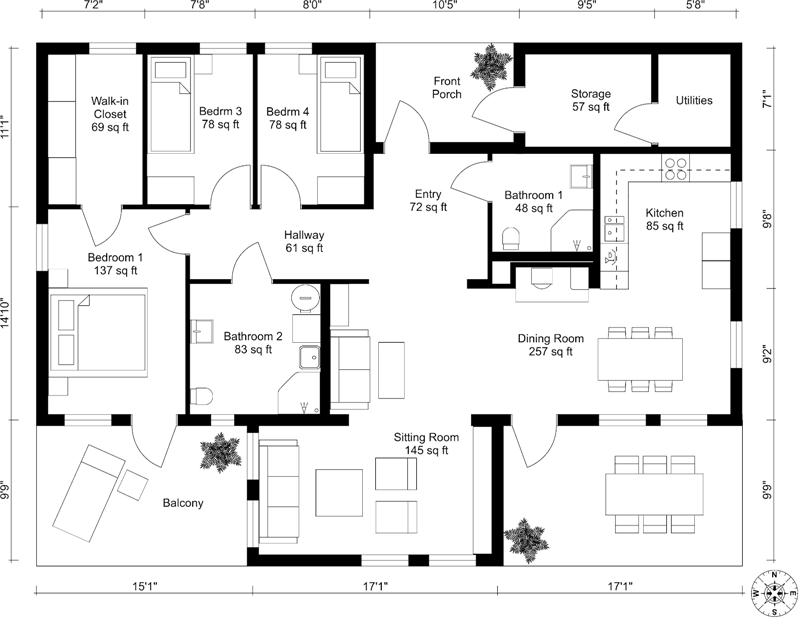
12 Examples of Floor Plans With Dimensions
This is a complete list of floor plans with dimensions, giving you lots of floor plan inspiration and examples.
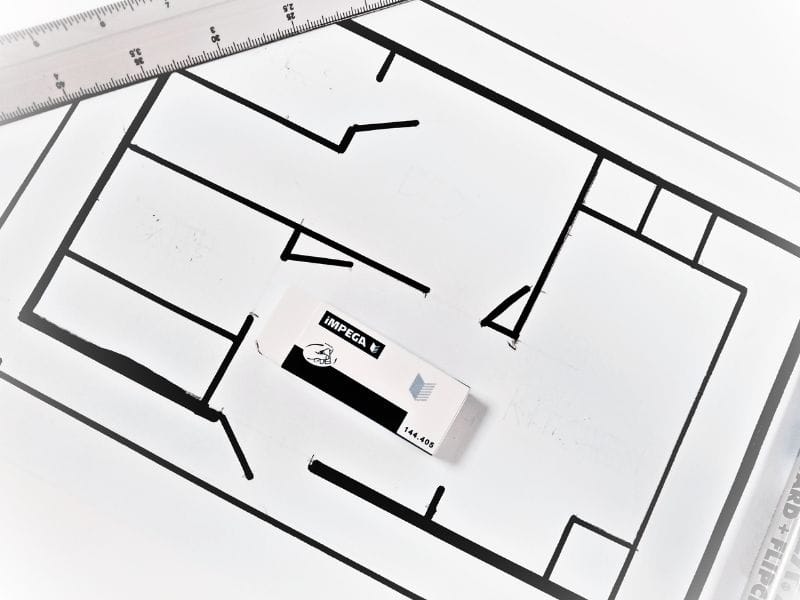
5 Tips on How to Draw a Blueprint by Hand
How do you draw a blueprint by hand quickly and efficiently? Discover the top tips on how to create an accurate blueprint using just pen, paper, and a laser measurer.