How to Create Half Walls in RoomSketcher
Have you been looking for a way to create half walls or a dividing wall in RoomSketcher, and not quite figured out how to do it? Well, we’re here to help, giving you step-by-step explanations of how to create this type of wall!

Half walls can easily be created in RoomSketcher, either by customizing items from the furniture library, or by creatively adjusting different wall types.
Option 1: Create a Half Wall Using Building Block
You can easily create a half wall in RoomSketcher by using building blocks, here’s how to do it:
- In Furniture mode, search for Building Block
- Choose the right type of Building Block
- Paying subscribers can Replace Materials on the Building Block to get the preferred finish
- In Properties, change the dimensions of the Building Block to suit the size you want your half wall to be
- Drag the Building Block into place where you want your half wall to be
And there you have it, a super-easy way to create a half wall!
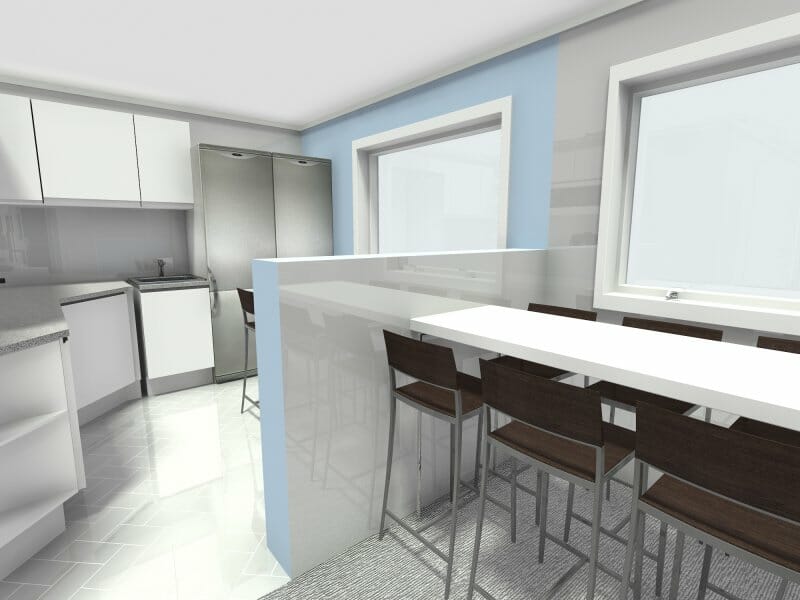
Now you can generate a 3D Floor Plan to see how it looks or check out your half wall in a 360 View.
Option 2A: Create a Half Wall Using Divider Drawing Tool
If you want a more customizable half wall, you can follow the steps below where you use the Divider drawing tool.
- In Walls mode, choose the Divider drawing tool
- Use divider lines to draw the outline of your half wall
- Click in the zone you just created and open Advanced Properties on the right
- In Floor Height, put in the height you want your half wall to have.
You have now successfully created a customizable half wall!

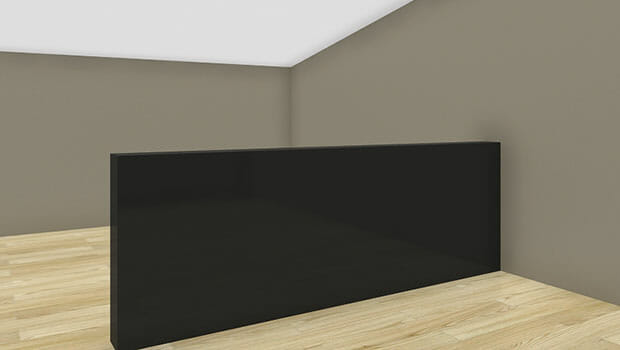
Option 2B: Custom Material on Your Half Wall
If you want to have a custom material on this wall, this is possible by following these simple steps:
- In Walls mode, click inside the room which contains the half wall. Its Properties appear on the right.
- Click Wall Material, choose the material you want on the walls of your half wall, and click Apply.
You have now created a half wall with separate materials, and if you want to change the color of the wall at any point, this is easily done by following the first three steps of the above explanation!

Get Started
So there you have it, two different ways of creating half walls in RoomSketcher! Be sure to share your projects with us, showing off your design with half walls. Just tag your image with #roomsketcher – we love to see all the wonderful things you create!
Don't forget to share this post!
Recommended Reads
How to Create Loft Spaces in RoomSketcher
We show you a quick and easy way to create a loft space in RoomSketcher!
How to Create Professional Interior Design Drawings
Why use costly and complicated CAD software to create a floor plan or design a room? Create the professional interior design drawings you need - quickly, easily and affordably with RoomSketcher!
How to Create Sloped Ceilings
Create floor plans and home design projects with sloped or cathedral ceilings. Discover our favorite sloped ceiling hints and tips to get you started fast.