How to Create a Floor Plan for Your House
Every home project needs a floor plan, but the best way to create one depends on what you’re starting with. Here’s how to go from an old plan, an existing space, or a blank site to a clear layout.


Quick summary:
The best way to create a floor plan depends on what you’re starting with.
If you already have a plan, you can digitize it with AI Convert or trace it manually in RoomSketcher.
If you have an existing home but no plan, capture the space with FloorCapture using an iPhone or iPad with LiDAR, or draw it yourself from measurements.
If you’re designing a new build, start with local rules and site planning before drawing the layout digitally.
Before you renovate, build, or redesign a space, you first need a clear understanding of the layout.
That’s where a floor plan comes in.
A floor plan is a scaled drawing that shows the layout of walls, doors, windows, and rooms, helping you understand how the space actually works before you start making changes.
It’s also one of the first things architects, contractors, and permit offices will ask for.
The good news is that creating a floor plan is much easier than most people expect. With RoomSketcher, there are several ways to get started, depending on what you already have.
Choose Your Starting Point
Most homeowners fall into one of these situations:
- You have an old floor plan as a sketch, blueprint, PDF, or image
- You have an existing home but no floor plan
- You’re designing a new build completely from scratch
Each situation needs a slightly different approach.
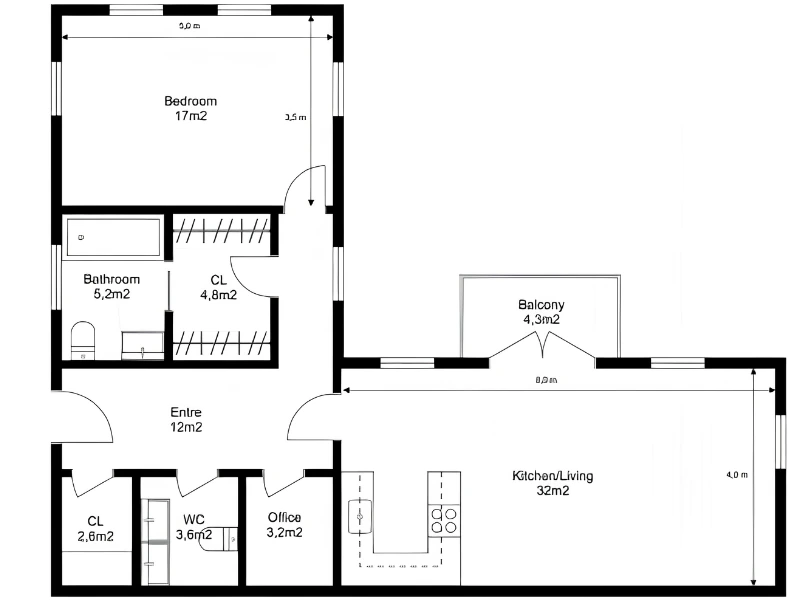
Path A: You Already Have a Floor Plan
A lot of homeowners already have some kind of floor plan, but it usually isn’t in a format that’s easy to edit or work with.
Maybe you found an old blueprint, received a PDF from a real estate listing, sketched the layout by hand, or want to update an outdated plan before renovating.
In most cases, you don’t need to start over from scratch. If you already have some kind of plan, you’re starting from the easiest position.
Check that the plan is still accurate
Before you digitize anything, quickly verify that the plan still matches the actual property.
Older floor plans are often outdated. Extensions, renovations, moved walls, and informal changes may never have been added to the original drawings.
Walk through the property with a tape measure and check:
- Overall exterior dimensions
- Main room sizes
- Door positions
- Window placements
If the plan and the property disagree, trust the property.
If you’re unsure how to interpret symbols, dimensions, or wall types, we've put together a quick guide on how to read a floor plan.
Once everything looks accurate, you can choose how you want to digitize the plan.
Option 1: Convert with AI
One of the easiest ways to reuse an existing floor plan is to digitize it.
Instead of redrawing everything manually, you can convert the plan into an editable digital project.
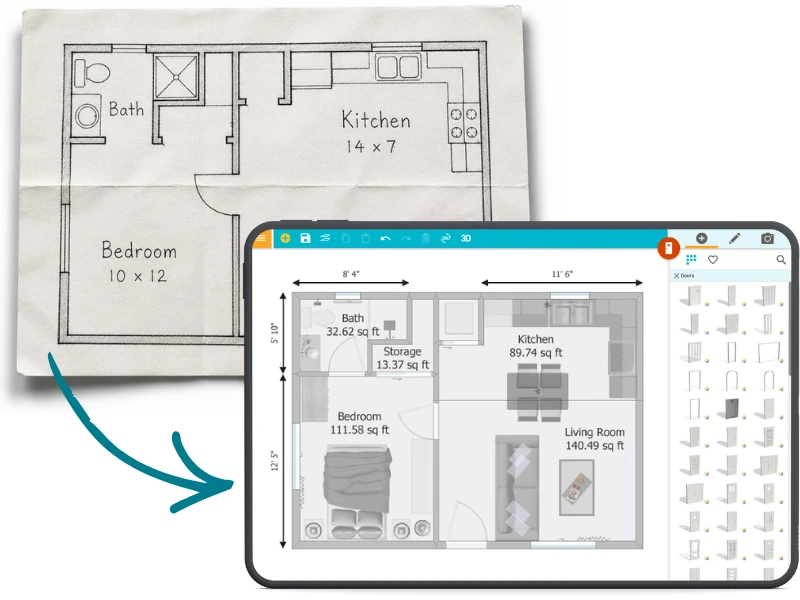
That’s where AI Convert comes in.
Upload your floor plan image or PDF, and AI maps out the walls, doors, and windows automatically, creating a fully editable floor plan inside RoomSketcher in just a few seconds.
Once converted, the project stays saved in your RoomSketcher account, making it easy to revisit and update later.
This works best when the original floor plan is reasonably clear and easy to read.
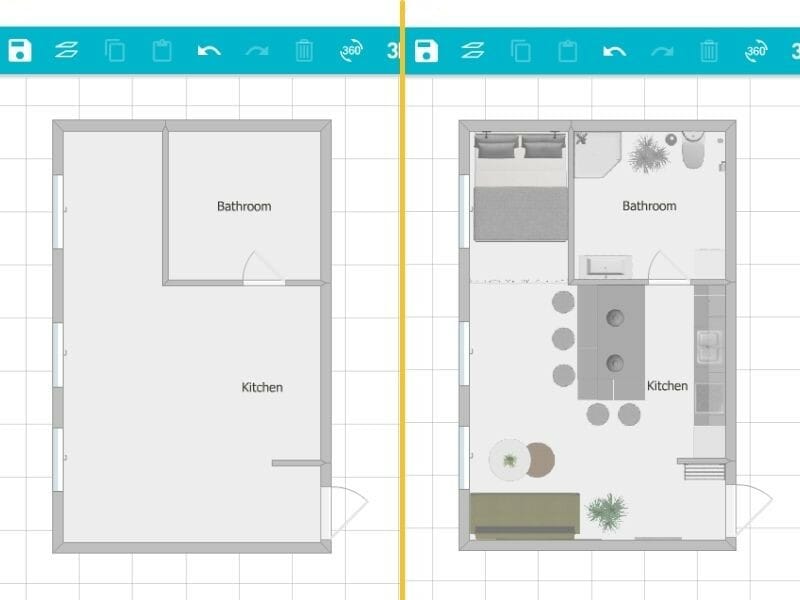
Option 2: Trace the plan yourself
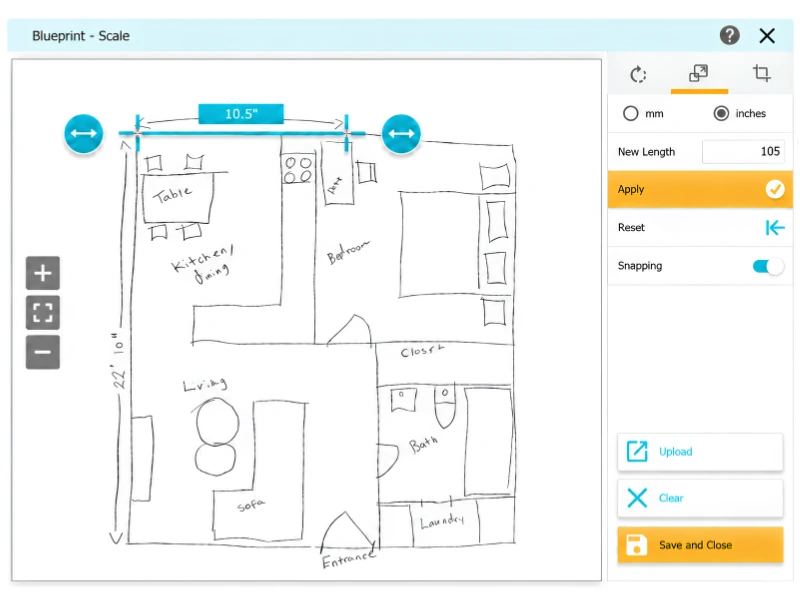
You can also import your floor plan as a background image and trace over it manually.
This works best for older, hand-drawn, faded, or hard-to-read floor plans that may not convert cleanly with AI.
By tracing the layout yourself, you can rebuild the plan step by step while still using the original drawing as a reference.
Path B: You Have a House but No Floor Plan
Capture the space with LiDAR
If no floor plan exists yet, you’ll first need a way to capture the space.
For existing homes, using a LiDAR capture is usually the fastest and most convenient option.
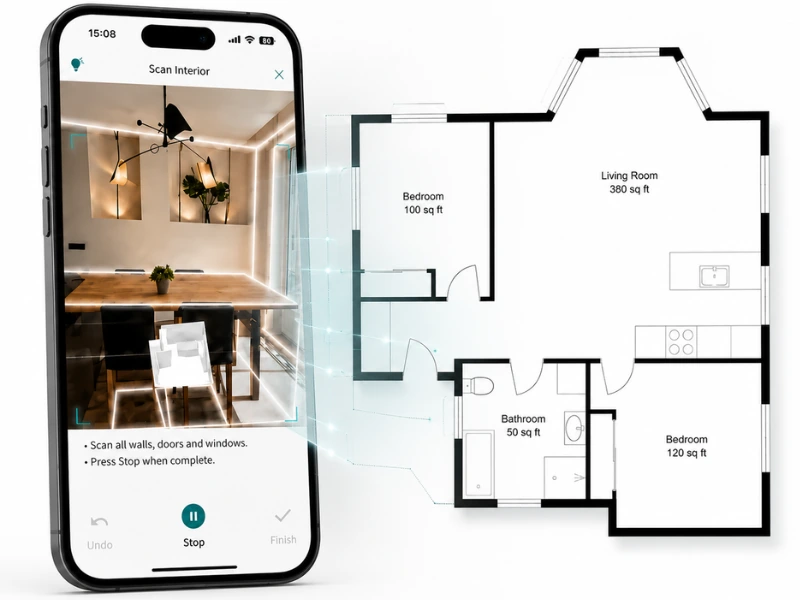
Instead of manually measuring every wall, door, and window, LiDAR helps you quickly map out the layout as you walk through the property.
With FloorCapture, you can use an iPhone or iPad with LiDAR to walk through the home while the app captures measurements automatically.
AI then converts the capture into an editable digital floor plan in RoomSketcher.
No LiDAR device?
You can still create the floor plan yourself by drawing it manually.
Start by sketching the layout room by room and collecting measurements as you go.
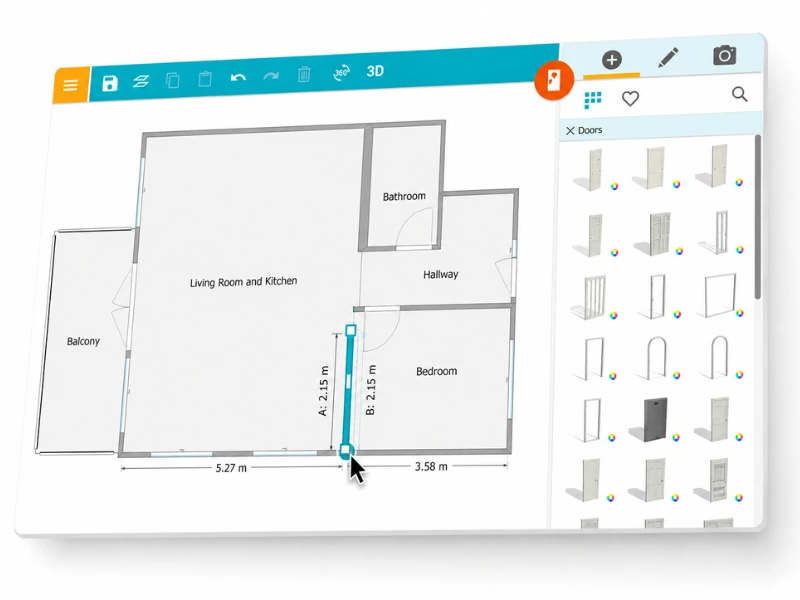
Once you have the basics mapped out, open RoomSketcher and draw the floor plan digitally.
You can type exact measurements directly into the wall tool, add doors and windows as you draw, and adjust the layout anytime afterward.
This approach takes more time than FloorCapture, but it works well when you want to shape the layout as you go or experiment with different ideas.
Path C: You’re Designing a New Build
Designing a new build means creating the floor plan from scratch, rather than documenting an existing home.
Before you start drawing, check the local building and planning rules for your property. These may affect the size, height, placement, and layout of the home.
Common things to check include:
- Setbacks from property lines
- Maximum building height
- Site coverage limits
- Heritage restrictions
- Flood or bushfire zones
It’s also worth thinking about how the site itself should shape the layout. Consider sunlight, views, privacy, noise, and slope before deciding where rooms should go.

Once you have a rough idea, open the RoomSketcher app and start drawing digitally. Begin with the exterior walls, divide the layout into rooms, and add doors and windows as the design develops.
Because everything stays editable, you can test different layouts, move rooms around, and refine the floor plan as you go.
Once You Have Your Floor Plan: Test and Share It
Test the layout before you build
One of the biggest mistakes homeowners make is assuming empty rooms will feel spacious once furnished.
They often don’t.
Before finalizing anything, drag furniture from the RoomSketcher furniture library onto your floor plan.
This immediately reveals problems like:
- Hallways that are too narrow
- Dining areas without enough clearance
- Bedroom layouts that don’t fit properly
- Doors colliding with furniture
- Awkward walking paths
Then switch to Live 3D and walk through the layout.
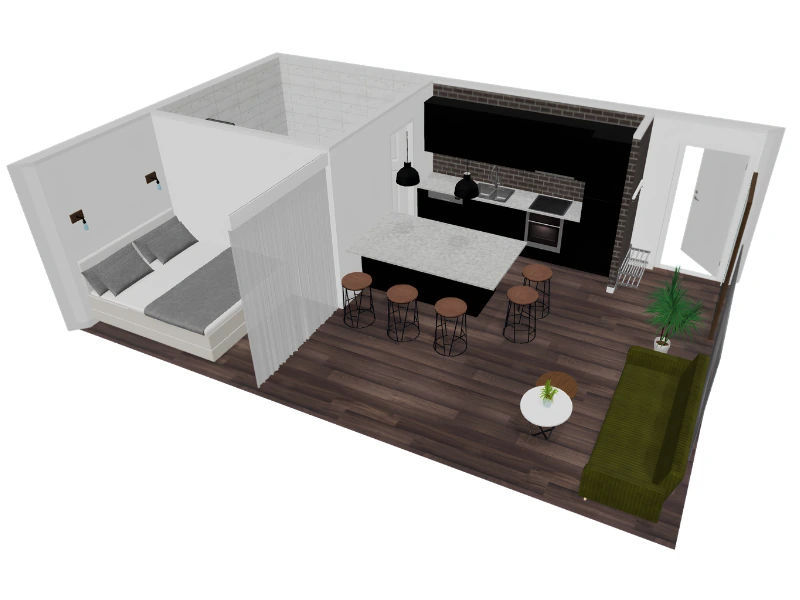
Flat floor plans hide a surprising amount. A room that looks fine in 2D can suddenly feel cramped once you experience it in 3D.
Catching these problems early is much cheaper than fixing them later.
Export and Share Your Floor Plan
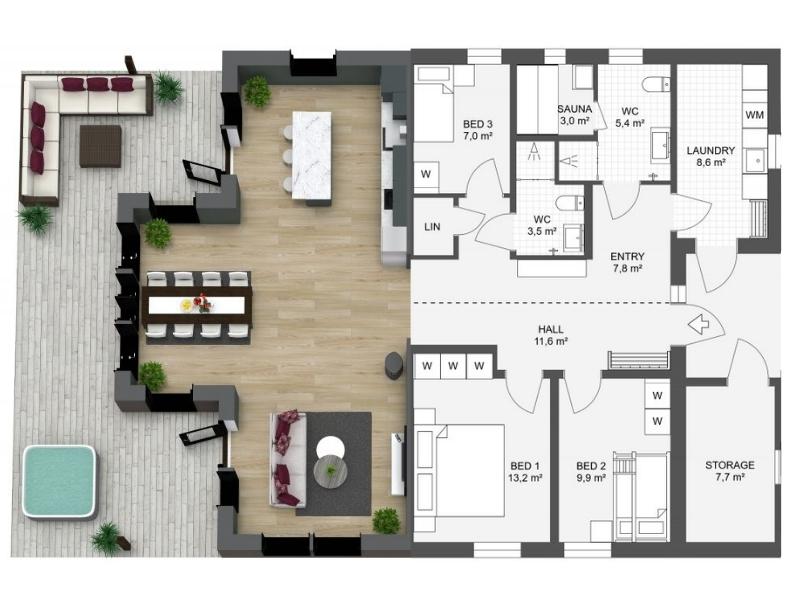
Once your floor plan is ready, you can generate clear 2D Floor Plans and impressive 3D Floor Plans.
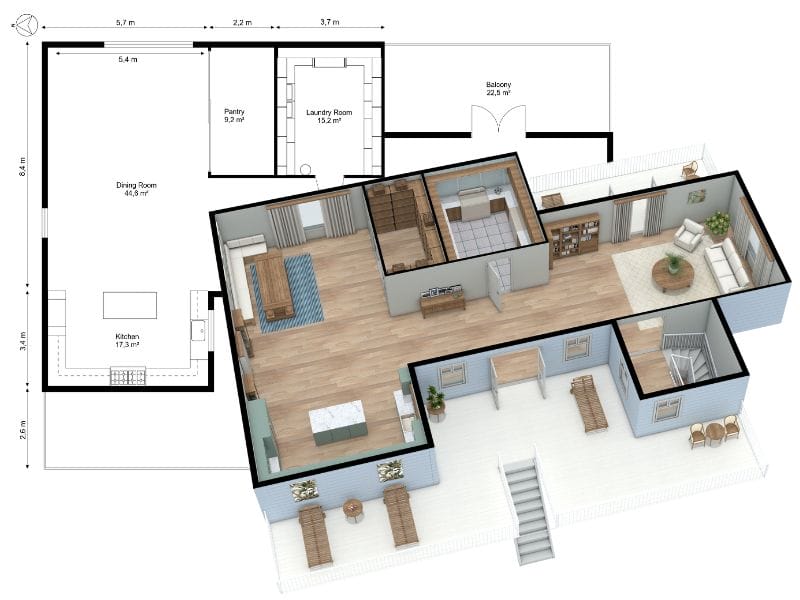
You can then export them as PDF, PNG, or JPG files, or share the project with a link.
This makes it much easier to communicate ideas with architects, contractors, interior designers, or family members.
Start Your Floor Plan
RoomSketcher is free to start and gives you multiple ways to create a floor plan depending on your project.
- Have a floor plan image or PDF? Use AI Convert
- Want full control? Trace your own floor plan
- Have an iPhone or iPad with LiDAR? Use FloorCapture
- Starting from nothing? Draw from scratch
Create your RoomSketcher account and start planning your house today.
Related Articles
The 8 Best Floor Plan Software Tools (2026 Update)
The market is flooded with floor plan software options, each promising to make your processes easier and more efficient. We've put the top tools to the test!

How to Design a House: From Sketch to Reality
We give you useful steps on how to design a house yourself. Discover the key steps to designing a house that perfectly fits your needs.

10 Ways to Find the Floor Plan of a House
Access to floor plans is essential for homeowners, real estate agents, and prospective buyers alike. If you’re struggling to find the original blueprints for a home, don’t worry—there are several effective strategies to help you locate them.