How to Make an Evacuation Plan with RoomSketcher
An evacuation plan outlines the safest routes to exit a building during an emergency. Learn what to include in your plan and how to create one in three simple steps.

An evacuation plan is crucial for keeping your family safe in an emergency. Whether it's a fire, natural disaster, or other crisis, having a clear plan everyone understands can mean the difference between remaining calm or panicking.
This guide will walk you through how to make an evacuation plan using RoomSketcher's intuitive evacuation plan software. We'll cover what an evacuation plan should include, three simple steps to create one, where to post it, and examples to help you prepare.
What Is an Evacuation Plan?
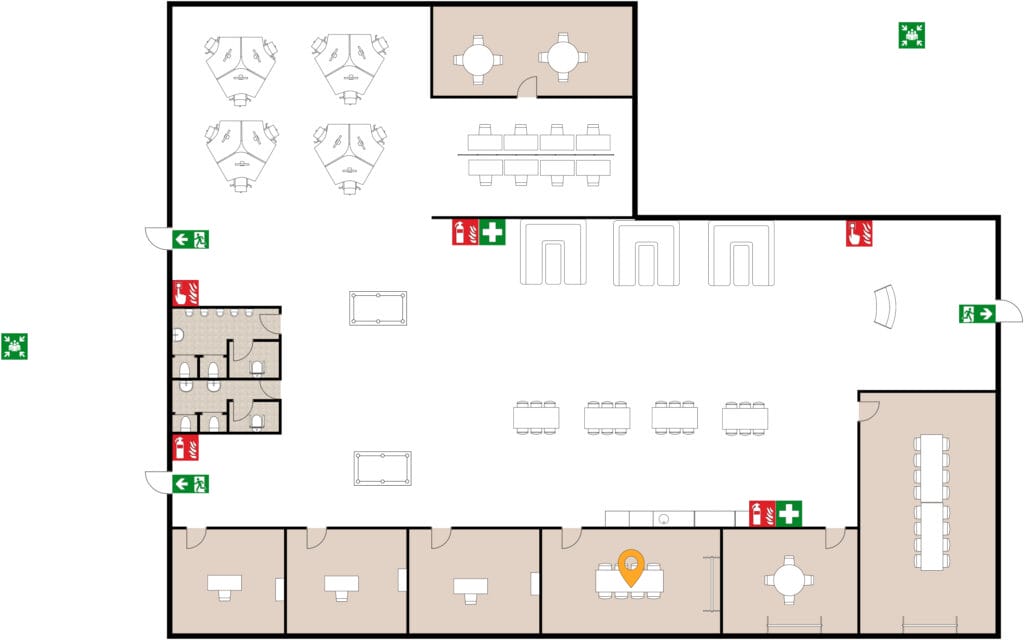
An evacuation plan is a map that shows the quickest and safest routes to exit an area in case of emergency. This usually appears as a floor plan showing clear paths and exit points. These diagrams are placed in key locations around buildings to guide people to safety.
What Should an Evacuation Plan Include?
An effective evacuation plan should include:
- A "You Are Here" marker
- Locations of all emergency exits, stairwells, and fire escapes highlighted
- Paths of travel to exits marketing with arrows or contrasting colors
- Locations of fire extinguishers, alarm pull stations, and other safety equipment
- Designated assembly areas outside the building
- Universally recognized symbols
Please note that evacuation plans must comply with relevant safety laws and building codes in your country, state, or region. Always check the regulations that apply to your location and building type.
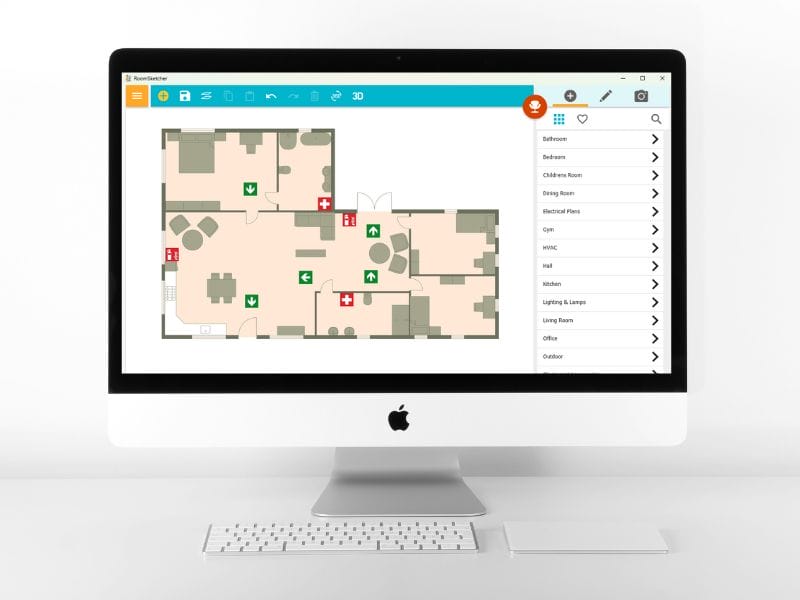
How to Make an Evacuation Plan with RoomSketcher
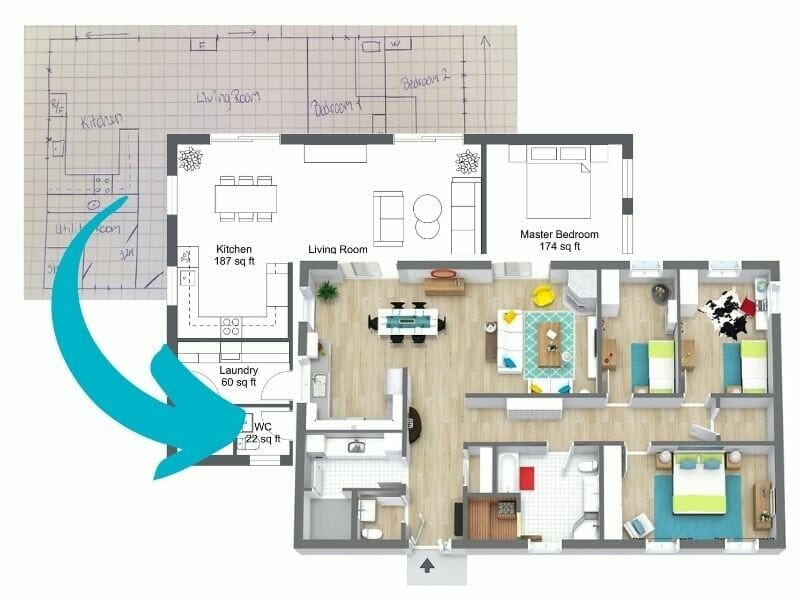
Step 1: Draw Your Floor Plan
In the RoomSketcher App, you can upload an existing blueprint of your building or draw it yourself. If you're starting from scratch, you can draw the walls, doors, and windows with just a few clicks.
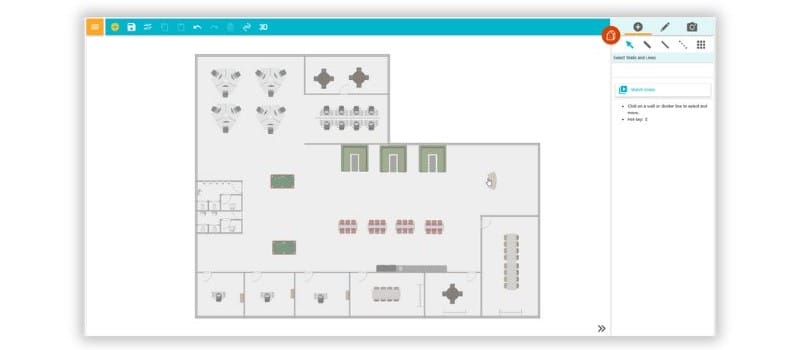
Once you have your floor plan, add key fixed installations and furniture. Evacuation diagrams should not contain every piece of decoration. Rather, consider the larger pieces that could potentially obstruct or alter evacuation paths.
As you design, RoomSketcher's powerful tools allow you to zoom in, rotate, and adjust your plan with precision, ensuring every detail is accurate.
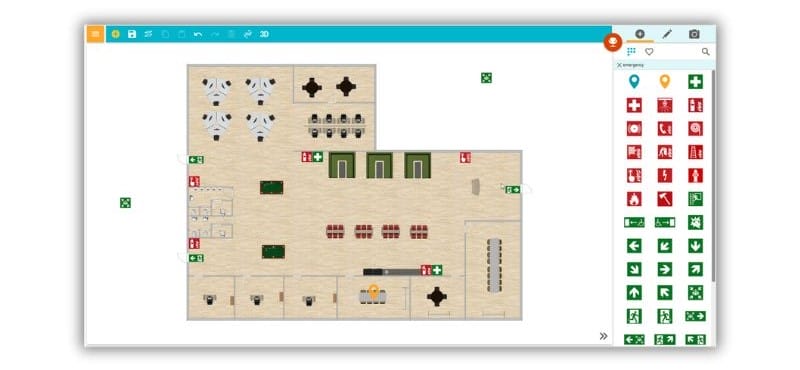
Step 2: Add Evacuation Symbols
With your floor plan in place and any potential obstacles accounted for, it's time to add symbols to bring your evacuation plan to life.
RoomSketcher has an extensive library of over 40 different fire and evacuation symbols. With a simple drag-and-drop motion, you can effortlessly position these throughout your floor plan, clearly indicating exit routes, assembly points, fire extinguishers, and more.
Don't forget to include labels and notes for extra clarity. With RoomSketcher, you can incorporate annotations, lines, arrows, and labels to produce a precise plan.
Step 3: Export, Print and Share
With one click, RoomSketcher creates a professional 2D floor plan that clearly shows your evacuation design. The high-quality rendering accurately captures all details.
Easily share your plan as a PDF or JPEG file. Print to scale for clear visibility when displaying the plan throughout the building during emergencies.
Where Should an Evacuation Plan Be Posted?
Evacuation plans should be posted in highly visible and easily accessible areas. Here are some recommended locations:
- Common areas (lobbies, hallways, stairwells)
- Workspaces (offices, cubicles, meeting rooms)
- Entrances and exits
- High-traffic zones (cafeterias, restrooms, elevators)
The key is to place them where people pass frequently or gather. It's a good idea to post the plans at different heights so everyone can see them easily.
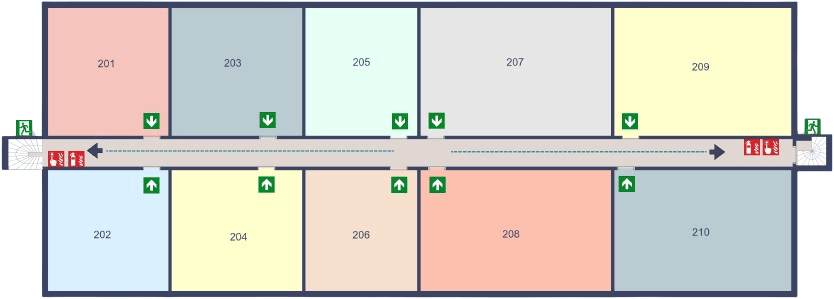
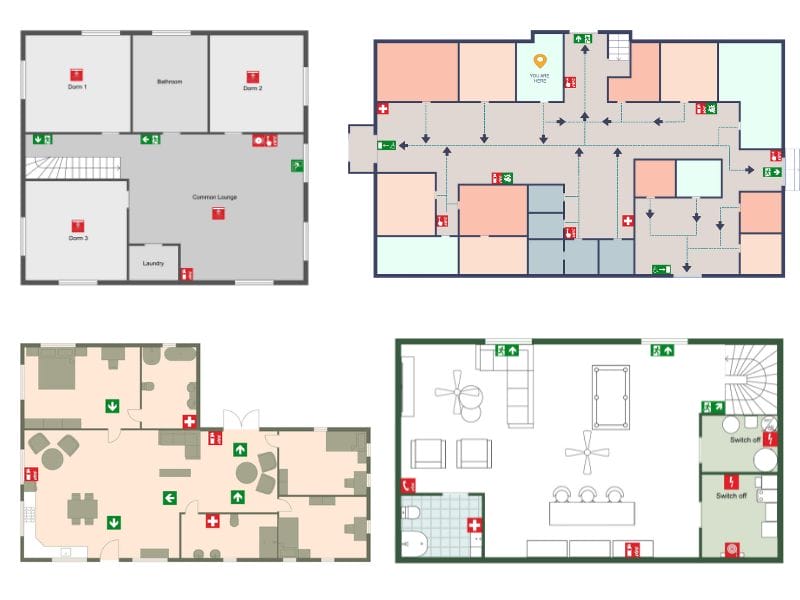
Evacuation Plan Examples
If you're looking for specific examples and guidance on creating evacuation plans for different types of buildings, such as homes, offices, and hotels, check out our guide: evacuation plan examples.
You'll find instructions, best practices, and visual aids to help you create effective evacuation plans that address the unique needs and layouts of each type of building.
Get Started Drawing Evacuation Plans with RoomSketcher
Don't let the thought of creating an evacuation plan overwhelm you. With RoomSketcher, the process is not only straightforward but also engaging and enjoyable. Embrace our user-friendly interface and create your emergency plan in no time.
- Draw a floor plan from scratch on a computer or tablet
- Import blueprints and sketches
- Explore hundreds of templates from our Floor Plan Gallery
- View tutorials and helpful videos to get you started
- Get help from our dedicated customer service team
Don't forget to share this post!
Recommended Reads
Evacuation Plan Examples
A well-designed plan can make all the difference during an emergency. Explore our evacuation plan examples, ranging from family homes to office complexes.
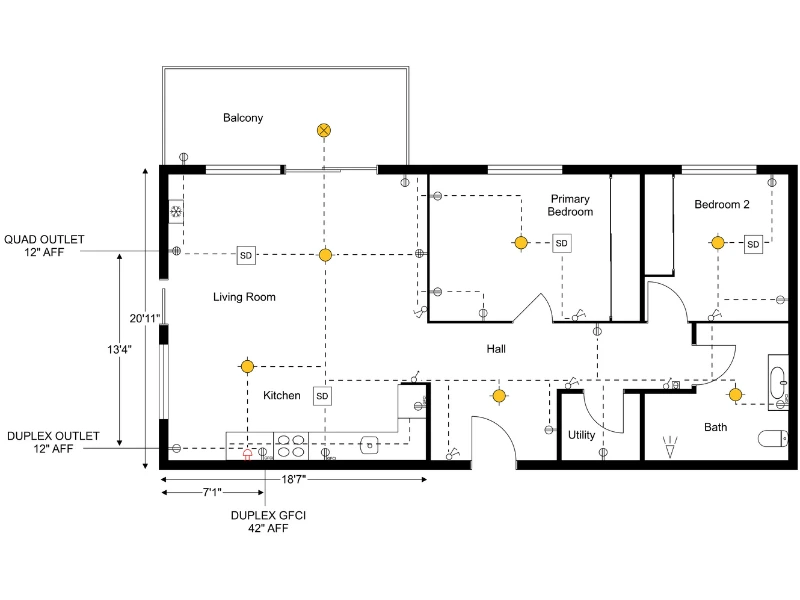
How to Draw an Electrical Plan with RoomSketcher
Learn how to draw an electrical plan step by step. This guide shows how to place lighting, outlets, and switches clearly on your floor plan so the layout is easy to understand and share.
How to Read Floor Plans: 9 Easy Steps
Learn how to read floor plans with our easy-to-follow guide. We'll walk you through interpreting measurements, analyzing layouts, and making sense of symbols step by step.
Learn More About RoomSketcher's Features

Floor Plan Templates

2D Floor Plans

3D Floor Plans

Draw From Blueprint
Order Floor Plans
